Monday, September 14, 2015

A One Hour Recipe: Zuppa Toscana! or Kale and Sausage and White Beans Oh My!


This is a really great soup. That being said many people have encountered it if they have ever eaten at an Olive Garden restaurant.

But this soup is really an Italian Peasant soup born of simple ingredients and yet culminating in a delicious end product that defines the term "greater than the sum of it's parts".

Now I have another dish which is actually where I first encountered this combination of flavors and that was a pasta dish made by my friend George. We would often go up to my friend Tony's house in the Pocono Mountains to have a little weekend get away. It was a treat as Tony was often off working somewhere and e would let me go up to use his house as a little get away.

George had been making this pasta dish for his partner Tom for years. It was one of Tom's favorite dishes. Sweet Italian sausage, kale, garlic, onions, red pepper flakes, a touch of cream plus a good dose of cheese all tossed with Orecchiette pasta, or "little ears".

Well this soup is virtually the same thing except it's a soup and not a sauce. Beans stand in for potatoes in my version and I use both chicken broth and chicken bullion to kick up the stock flavor. I also only use half and half to lighten up the soup a touch. Well just a touch.

This really is so easy and so good. And it's a perfect meal for the upcoming fall season with it's cooler days and even cooler nights. This Soup, a hunk of good Italian bread and a green salad and you have a meal on the table in one hour. So fix this for your family, your friends, or yourself but fix this you'll be so glad you did.

Zuppa Toscana

Ingredients:

1 tablespoon olive oil
1 tablespoon bacon fat
1 Medium onion finely diced
2 carrots finely diced
3 celery stalks diced
2 cloves finely minced garlic
1 pound sweet Italian Sausage
10 oz bag of fresh chopped kale ( including stems)
2 8 oz cans of white beans drained and rinsed
4 cups chicken stock
2 cups water
3 chicken base envelopes ( trader joe's)
1/2 teaspoon red pepper flakes
Salt and pepper to taste
2 cups half and half
1 cup grated parmesan

Method:

Heat oil and bacon grease in a heavy stock pot
Cook the onions, carrots and celery in the pot and add salt and pepper
When almost soft then add the garlic and allow to bloom about 2 minutes
Cook till soft then add the sausage taken out of the casings
Cook till browned then add the Kale in two batches allowing it to cook down fully till softened
Add the beans
Add the chicken stock, water and chicken base and red pepper flakes
Bring to boil and reduce to simmer, cook covered for 30 minutes
When ready to serve add the cheese and stir to melt
Then add the half and half and stir in
Let cook for about 5 minutes and serve
Place in a bowl and sprinkle with a little more grated parmesan cheese

Enjoy Ya'll!!


Friday, August 7, 2015

Pork Chops Scallopini with Mushrooms and Thyme


Pork Chops are a hard thing to cook well. Especially the run of the mill grocery store variety. Yet for so many homemakers it's a very economical option for putting meat on the table. So I have decided over the course of the rest of this year to take on the challenge of making amazing pork chop recipes and sharing them with you all. Hopefully they will inspire you to find your inner pork lover and give them a try.

This recipe started with boneless center cut pork chops in a family pack of 6 chops. I thought that two chops would be a portion but when paired with a simple arugula salad and a pan of my cornbread one chop became a meal.

I started with a regular recipe for pork scallopini with capers and a wine butter sauce. And then decided to bump up the bulk of the dish by adding mushrooms and onions. It came out really really well. In fact when we ate this we both looked at each other and said, oh yes, that's good.

So try this out this Summer and I'm sure that this recipe will be one you are making well into the fall. Enjoy Y'all!

Pork Chops Scallopini with Mushrooms and Thyme ( serves 4-6)


6 good sized center cut boneless pork chops about an inch or more thick
flour for dusting plus 1 heaping tablespoon to add to the sauce
6 tablespoons of butter
2 tablespoon olive oil
1 1/4 cup white wine
2 teaspoons of lemon juice
1 medium spanish or white onion thinly sliced into rings
1 pound white mushrooms ( 1/4 sliced and the rest quartered)
2 teaspoons dried thyme
1 1/2 tablespoon capers
4 tablespoons chopped fresh parsley
Salt and pepper to taste

Method

Heat 1 tablespoon olive oil and 1 tablespoons butter in the pan to medium high
Sprinkle the chops with salt and pepper
Dredge the chops in flour and quickly cook over medium high heat till just seared brown on both sides
Hold to the side on a plate
Add the rest of the olive oil and one tablespoon of butter to the pan
Add onions with a good pinch of salt and pepper and cook over medium heat till softened and slightly browned just till they have some color
Add the mushrooms  and thyme and cook till just slightly softened then add 1/4 cup of wine and deglazed the pan
Sprinkle the flour over the pan and stir to combine
Add the wine stir into the sauce

Add the capers
Taste sauce and season if needed
Nestle the chops into the mushrooms and onions and capers sauce spooning some of the mixture over the chops to cover the chops
Cover and turn heat to low and simmer for about 20 mins
When ready to serve add the remaining butter lemon juice the parsley stir in slowly till mixed and melted
Serve with a good portion of an arugula salad dressed tossed with lemon juice, olive oil and salt and pepper. Also serve cornbread on the side.


Tuesday, August 4, 2015

Black Forbidden Rice with Ginger and Toasted Sesame

In ancient China this rice was reserved for the imperial court and the Emperor. It was thought to have special properties and as such was thought to be only for him. I don't think it has any special properties other than being delicious. Trader Joe's now carries this rice and you should make it. just be aware while it is cooking it has very dark blue black color that leaches out from the rice and will stain wooden cooking spoons and such. But that aside the texture and flavor are tremendous.

Nutty and chewy with a slight crunch. Flavored with ginger and sesame oil and other flavors this rice delivers and it's visually stunning. Make this with Pepper Steak or Soy Glazed Red Short Ribs or serve with a Orange Chicken and Shrimp with cashews. It's also great at room temperature so make this this summer and serve it on the patio with your BBQ or on the buffet for your Summer party.

Black Forbidden Rice with Ginger and Toasted Sesame
( this recipe can easily be doubled or tripled)

Ingredients:

1 cup black rice
2 cups water
1 Tablespoon Ground Ginger
1 Tablespoon plus 1 teaspoon toasted sesame oil
1 Tablespoon soy sauce
1 1/2 Tablespoons rice wine vinegar
2 teaspoons garlic powder
1 1/2 cups chopped scallions on the bias
2 tablespoons sesame seeds

Method:

Bring water to a boil and then add the rice.
Cook for 30 minutes or more until the water is gone
Remove from heat
Right after removing from heat stir in all ingredients except the sesame oil, scallions and sesame seeds.
Taste for seasoning and add salt if needed.
When cool add the sesame oil, scallions and sesame seeds reserving a few scallions and seeds for garnish.


Tuesday, July 28, 2015

Sticky Asian Glazed Pork Belly Kale and Peanut Salad


I love bacon so it's no surprise that I might be interested in Pork Belly. It's basically bacon in it's pure form.

Now pork belly is a fatty meat but if cooked down to it's pure form it's really just delicious and not that bad. I love the juicy meaty goodness that is a joy to eat. And this recipe draws out the purest form of the  meat from the pork belly. It's got far east flavors and some delicious greens which makes it easy to enjoy as a meal in itself.

I love the salad as a meal concept. I grew up with this from childhood. My parents had encountered this idea when they were stationed in California in the 1960's. It was a new thing back then. At that time it was mostly in the west that were people eating that way. But as this concept continued to expand it became very popular. Wolfgang Puck started a national craze in the 1970's when he created what would be commonly known everywhere as the "Chinese Chicken Salad". It was a green salad with chopped veggies, chicken, almonds, crispy noodles, mandarine orange slices and a delicious dressing with asian flavors. It became the basis for all the main course salads we enjoy today at every restaurant you go to these days.

My salad is a riff on this concept. But to update it I used kale and cabbage and changed up the meat to a stir fried asian pork belly that uses Korean chili paste gochujang to provide a little bit of heat and flavor. I love peanuts and roasted peanut oil and use them as crunch, texture and to flavor the dressing. But I kept the mandarine orange slices for the fun and color and added radishes for color and crunch.

Now pork belly is a labor of love if you make it at home. Basically you roast it in the oven low and slow braising it till you have a delicious piece of meat. Then you cool it down and slice it up and stir fry it in a wok or pan on high heat caramelizing the chili paste and other ingredients into slices of deliciousness.  And nowadays you don't have to roast it if you don't want to because you can find it cooked at many grocery stores. Which makes making this recipe pretty easy.

Give this salad a try and become a summer salad superstar! Enjoy

Sticky Asian Glazed Pork Belly Kale and Peanut Salad

Pork Belly ingredients:

1 pound of cooked pork belly
3 heaping tablespoons of Korean Chili paste
1/4 cup soy sauce
3 tablespoons prepared BBQ sauce or catsup
2 teaspoons of sesame oil

Method:

Take the pork belly and slice it about 1/4 inch thin
Heat a small amount of vegetable oil in a wok or skillet
Add the chili paste, soy sauce, and catsup or BBQ sauce
Stir to combine then add the pork belly slices
Stir fry till the pork is coated in the sauce and continue to cook till the pork becomes crispy and dark in spots. Glazed with the sauce and cooked red and colorful. At the very end add the sesame oil and sesame seeds. Turn heat off and hold till salad is tossed.

For the salad

3 cups curly kale chopped into fine shreds.
3 cups Green cabbage also chopped into fine shreds.
1 carrot shredded
5 radishes finely sliced some reserved for garnish
1 cup of crushed peanuts, 3 tablespoons reserved for garnish
4 or 5 scallions cut on the bias 2 tablespoons reserved for garnish
1 6oz can of mandarin orange segments drained ( handful reserved for garnishing top)

For the dressing


3/4 cup Roasted Peanut oil
1/4 cup rice wine vinegar
2 tablespoons lemon juice
1 Tablespoon honey
1/2 teaspoons black pepper
1 teaspoon salt
1 heaping tablespoons dijon mustard
1 teaspoon worcestershire sauce
2 tablespoons soy sauce
1 teaspoon sesame oil
1 teaspoon water
1 teaspoon garlic powder
3 anchovies filets (optional)

Place in a food processor and mix well till combined.

To prepare the salad place all ingredients in a bowl and toss with the dressing
Place in a serving bowl and top with the pork
Garnish with the remaining scallions, peanuts, oranges segments and radishes. 


Monday, July 13, 2015

Jimmy Crack Corn....Mexican Street Corn


Now I have been making this for the past several years with various results but after several different versions I have settled on this one. This corn is good. So good people call it crack corn. I made this for On the Plate when we were doing summer BBQ dinners and people just loved it. Back then in NYC not very many people were familiar with this. However, in California where my business partner was from they had known about this for years. This is not really traditional street corn because I use parmesan cheese and not Cojita cheese which is the real deal. You can use whatever you like this is just easy for me cause I always have a big chunk of parmesan in my fridge. So give this a try for your Summer corn fest. Cheers.

Mexican Street Corn

Ingredients:

6 to 8 ears of corn
3/4 cup mayonaise
1/2 to 3/4 cup grated parmesan cheese ( Grand Padano)
1/2 teaspoon salt
1/2 teaspoon garlic powder
1 1/2 tablespoons chili power plus more for garnish
Several shakes of hot sauce
juice of one lime
lime zest and chopped chives or cilantro for garnishing

Method:

Peel back the corn husks and reveal the ears
Make sure the hair is gone and thin the leaves out a little
Place a large piece of foil on a baking sheet
Oil the corn and place on the foil with the husks hanging off the sheet
Heat oven to 375
Cover Corn with another foil sheet and seal edges leaving the husks outside the foil
Bake corn for 45 mins to one hour

Mix the mayo with half the cheese, garlic powder, the salt, chili powder, hot sauce and lime juice

When corn is done remove from oven
Slather the corn with the mayo mixture
Then sprinkle with the parmesan cheese
Garnish with more chili powder and lime zest and the cilantro or chives
Enjoy

Saturday, July 11, 2015

Fried Chicken Thighs and Chive Cheddar Parmesan Waffles with Franks Red Hot Cream Gravy


Sometimes you just go with an idea and it turns out amazingly well. So it is with this recipe. I was in the mood for Fried Chicken and decided to try to make a recipe for chicken and waffles I would like. Generally I don't like chicken and waffles but I decided to see if I could prove myself wrong and find a version I like.

This one hit it straight on the head. It's so good I actually thought I had found a new favorite. Give these a try if you want to do some down home old school fried chicken goodness.

Chive Cheddar Parmesan Belgian Waffles ( makes 4-5 waffles)

Ingredients:

2 Cups Flour
2 Tablespoons Baking Powder
2 large eggs well beaten
2 cups whole Milk
1 cup grated Extra Sharp White Cheddar
1 cup grated Parmesan Cheese
2 tablespoons vegetable oil
4 tablespoons chopped chives ( two reserved for garnish)
Maple Syrup

Mix dry and wet ( including cheese and chives ) ingredients separately
Slowly combine till well mixed
Heat Belgian waffle iron and pour a ladle of mix in and cook till brown and toasty
Hold Warm until ready to use or freeze till another use

Crispy Fried Chicken Thighs  Makes 4 servings

1 chicken thigh per guest
1 cup flour
1 egg
1 teaspoon black pepper
1 teaspoon sweet paprika
1 teaspoon garlic powder
1/2 teaspoon salt
1 cup buttermilk
2 to 4 cups peanut oil or other fryer oil
1 small brown paper bags
salt and pepper for seasoning

On a plate season the chicken and place in the fridge for 15 mins
In a bowl mix the egg and the milk
Add the flour and spices to the bag
Take each piece of chicken one at a time and place in the buttermilk mix till coated then place in bag
Shake the four pieces really well till coated
Place on a rack and let sit for 20 mins
Heat oil in a cast iron skillet or pan heat till really really hot
When ready carefully place the chicken into the pan
Turn heat to med low, cover the pan and cook for 30 mins
Then remove lid
Turn heat to high and cook till chicken is crisp
Hold in oven with Waffles till ready to serve


Creamed Hot Sauce Gravy


3 tablespoons chicken fry oil
6 tablespoons flour
3 tablespoons butter cut up
1 teaspoons garlic powder
3 cups  of warmed whole Milk
salt and coarse ground black pepper
3 tablespoons Sherry Vinegar
4 tablespoons Franks Hot Sauce ( or to taste )
Water to thin

Heat butter and oil
Add the flour cook about 3 mins
Slowly add the milk whisking constantly
add the spices and cook till thickened
Add the vinegar and hot sauce stir in well 

To serve place the waffle in a bowl and drizzle with syrup
Place chicken on Waffle
Ladle gravy over and sprinkle chives


Saturday, June 27, 2015

Summer Tomato and Ricotta and Basil Focaccia Bruschetta

Summer is the best time to eat tomatoes. I love them. I think that during the warm Summer months when things are a little freer and time slides by a little slower it's only fair to say the the produce makes the season. And I think that tomatoes in particular are an amazingly special gift with their sun kissed skins nearly bursting with juicy deliciousness.

So these little beauties are the star of my summer evening table. I love making bruschetta in general. But when faced with the choice of ingredients I go for the gold with these.

The other obvious part of bruschetta is of course the bread. So the choice for a base is important. I am choosing focaccia because I love it's flaky soft juicy texture and when crisped it is tremendously delicious.

So here's a quick recipe for your backyard this summer. Enjoy!


Ingredients:

Fresh Grape or Cherry Tomatoes halved
Ricatta Cheese full fat about 8 oz
between 1 and 2 tablespoons of basil pesto ( you can make or buy this at your grocer)
How much you put in depends on how strong you want the basil flavor
Fresh basil about a bunch
Good quality olive oil ( a great olive oil really makes the difference, spend the money)
1 small loaf of focaccia bread

Method:

Cut bread into rectangular segments about 4 inches by 12 inches then slice bread into square slices about 1/2 in thick.
Heat oven to 375
Place bread on a baking sheet and then drizzle a little olive oil and sprinkle with some sea salt flakes
Bake until the bread is a little brown and toasty
Remove from the oven and let cool
Mix the ricotta cheese and pesto together till smooth and creamy
Cut the basil leaves into chiffonade
Mix the tomatoes and basil with just enough olive oil to coat nicely
Top the bread with a good smear of the riccotta
Top the bread slices with the tomatoes and basil mixture
Sprinkle with a little sea salt and serve
Enjoy


Friday, June 12, 2015

Gruyere, Swiss cheese and Dill Pickle Quesadillas with Tomato Soup Crema

One of the best things on the planet to me is any kind of grilled bread and cheese. I mean who doesn't love a really great grilled cheese. Buttery crispy browned goodness mixed with melty smooth delicious creamy cheese. It's delicious.

Well the Mexican version of that great grilled cheese sandwich is or course the quesadilla. Usually stuffed with chili flavored ingredients and other fixings melded together with melted soft delicious cheese.

So having to make lunch the other day I discovered this blend of grilled cheese ingredients with a tortilla shell. I had a few things in the fridge and decided to experiment. Well it came out deliciously. It's a bit of a strange flavor combo I admit. But all together it really is quite amazing. Especially if you like dill pickles.

Gruyere Swiss Cheese and Dill Pickle Quesadillas with Tomato Soup Crema

10 tortillas ( large burrito sized flour)
12 oz grated swiss and gruyere half and half mixed together
6 oz softened cream cheese
6 oz boursin cheese
1 jar dill pickle chips
1 tablesoon dijon mustard

Method:

In a small mixing bowl beat cream cheese, boursin and mustard together
Divide evenly on five of the tortillas and spread evenly
Place dill pickle chips around the tortillas about 8 to 10 per tortilla
Sprinkle each with the cheese mixture dividing among the tortillas
Press another tortilla on top of each

In a non stick skillet place a little oil or spray pan with oil spray
Cook each quesadilla till slightly browned and the cheese is well melted
Place on baking tray and keep warm in low oven
Repeat with all the quesadillas
When ready to serve slice each into 8 wedges and plate
Serve with tomato soup crema

Tomato Soup Crema

1/2 can tomato soup concentrate
8 oz of sour cream
1 1/2 tablespoon chopped fresh basil
1 tablespoon grated parmesan cheese

Method

Mix all ingredients together and let sit for at least 2 hours before using so flavors mary together


Friday, May 8, 2015

A Frenchman and a Mexican walked into a bar.....Creamed Spinach and White Queso Nachos

So it was just Cinco De Mayo and every flipping food blogger is writing up and publishing a recipe about a Mexican dish that will be the new addition to your party table. So that is exactly what this post would have been if I had gotten to it on time. However, I did not so here it is a little late.

So these nachos are really from a restaurant in South Carolina called California Dreaming. At least the idea is. They are the least truly Mexican nacho recipe possible. But they are really dang tasty. So California Dreaming made these nachos pretty well but I will say they were a little on the bland side. So I have taken the idea and souped it up for a new and better Nacho experience.

My idea of the perfect nacho is that there is flavor from the cheese and flavor from the toppings. And somehow if done right they become more than the some of their parts. I also think there should be both cheese sauce and shredded cheese. And as for toppings they should be colorful and fun.

So this recipe uses a queso sauce as well as a creamed spinach sauce shredded jack and romano cheeses and jalapenos, white onion, fresh tomatoes, cilantro, california black olives. Sour cream and Salsa are served on the side. It's kind of amazing. You should try these. Enjoy Ya'll!

Creamed Spinach and White Queso Nachos

1 Bag good quality nacho corn chips ( Chains like Chipotle sell fresh chips by the bag)
Creamed spinach Sauce ( see recipe)
White queso sauce ( see recipe )
1/2 cup grated white cheddar or jack
1/4 cup grated Romano
1/4 cup diced tomatoes
3 tablespoons red onion diced
handful chopped cilantro
4 chopped chopped scallions
1/4 cup canned black olives
Sour Cream
Salsa Fresco

For the spinach ( this makes extra creamed spinach for leftovers)

Creamed Spinach Sauce

Ingredients:

1 quart heavy cream
4 ounces of crushed garlic
1 pound frozen spinach thawed and drained really well
2 teaspoons salt
2 teaspoons pepper
A pinch or two of nutmeg
A splash of sherry vinegar
2 ounces of butter

Method:

Bring the cream to a simmer in a sauce pan over low to medium heat then add the garlic
Reduce cream by half.
Add the spinach, salt and pepper
Heat for approximately 5 mins or so add the butter and the vinegar
Transfer to a blender and blend till smooth
Hold warm


Homemade White Queso Dip

Ingredients

1/2 pound white american cheese
1/4 cup whole milk
1 tablespoon butter
1 4oz can of green chilies
1 teaspoon of cumin
1 teaspoon garlic powder
Pinch of cayenne pepper

Method:

Place the cheese the milk and the butter in a sauce pan over low heat and cook slowly till melted together stirring frequently to combine
Add in the green chilies, cumin, garlic powder and pepper
Add salt to taste
If it's too thick add a little more milk
Hold warm till serving

To Prepare Nachos

Heat spinach and Queso Sauce separately

On a large platter spread some chips on the bottom then pour some queso over them and spinkle some cheese and olives and scallions over them
repeat layers two more times
Place in oven for till cheese starts to melt
Remove from oven pour some spinach sauce over them
Top with remaining cheese
Broil till the cheese is browned
Remove form the oven and top with remaining toppings
Serve with sour cream and salsa on the side


Sunday, May 3, 2015

Carbonara the Pasta Guilt Left Behind

I can't think of a pasta dish that embodies the essence of round luscious meaty savory goodness more than this pasta dish.  It's a rich dish to be sure and made the traditional way it's probably the epitome of Italian edible decadence. The dish is Roman and was originally what the cooks from the restaurants would make for themselves late night after work and a couple of rounds of wine. An absolute play on the breakfast for dinner theme.

I first had carbonara when I went to Switzerland. It was prepared by one of the local ladies I met there. She was from the Italian part of Switzerland, Tessin. A small but beautiful area comprised mostly of mountain bound lakes and towns bordering Italy proper. The regional dialect there is Italian and the food stems also from the boot of Italy lying just below.

The version she made was a traditional one in which egg yolks are mixed with hot water to keep them from scrambling then tossed with hot pasta, bacon, loads of pecorino romano cheese and finished with a heavy dose of ground black pepper. It's delicious.

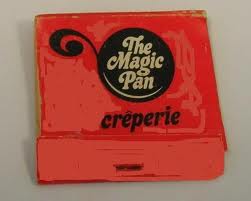
The second opportunity I had to try carbonara was at the Magic Pan a restaurant that I worked for during college. They made it in a very American manner using cream instead of egg and adding sauteed onions and mushrooms and some green peas along with the bacon. It actually was more delicious. That's right forgive me my Italian friends but it was.

I have over the years adapted the original Pan recipe to include egg yolks. It's rich it's decadent and it's so good you'll find that no amount of guilt will stop you from wanting to consume the whole plate. So just enjoy and stop feeling badly about eating rich things. If you eat them on occasion there's nothing wrong with it. After all if one is to feel guilty about something they might as well have enjoyed it!

Fettucini Carbonara ala Forrest

Ingredients


4 1/2 ounce Bacon Drippings 
8 tablespoons Mushrooms, quartered/halves
8 tablespoons Sautéed Onions
 8 tablespoons Precooked bacon, 1⁄2" pcs
2 tablespoons chopped fresh chives
2 Tablespoon Fresh Parsley Chopped
8 Tablespoons Parmesan/Romano Cheese mix
10oz  Whipping Cream, un-whipped
3 egg yolks 
16 oz Fettuccini, cooked 
Salt to taste
loads of Black Pepper freshly ground

Method

In a sauté pan add the onions, mushrooms, bacon pieces, and cheese mix in a hot pan with the bacon drippings. Heat for several minutes. 
In another pot heat cream
In a bowl slowly add 1/4 cup of cream to the egg yolks and gently mix.
Add the cream and fettuccini and blend well with the other ingredients. 
Heat for several minutes.
Add egg mixture
Add chives
Do not allow the cream to cook too hard or hot or to evaporate—only heat the ingredients thoroughly. Pour the fettuccini onto a heated large oval platter. 
Sprinkle the chopped parsley over the top and serve. 


Saturday, April 25, 2015

THE MAGIC PAN POTAGE ST GERMAIN


Ok it's time for this soup. When I worked at the Magic Pan this soup was somewhat of a revelation. It's so good that it was one of those things on the Pan's menu that people came into have specifically. It was in essence a "hook" dish. You know one of those dishes that restaurants dream of having that people come in time and again as fans to savour.

Now if you have been reading my blog you will know that I have referenced the Magic Pan Restaurant before. But for those of you who have not been a brief story.


The Magic Pan was a restaurant chain started by a Hungarian Couple , the Fono's in San Francisco in the 1970's. The original concept had been an Austrian style crepe restaurant mostly with recipes from Mrs Fono's family background. There were Ham crepes and Spinach crepes and chocolate and Strawberry crepes for dessert.

The business expanded and was purchased by Quaker Oats in the 1980's. They took the concept expanded it to a french country kitchen concept and rolled it out across the nation. The center piece of each Magic Pan was the giant tile enclosed Crepe Wheel which spun around and cooked the crepes and other dishes while the customers looked on. I remember as a 12 year old being taken to the Pan and being just mesmorized by the giant cooking wheel of crepe goodness! It was one of the first "chain" restaurants in the country in a time when the US was just beginning to discover different foods. The Pan delivered that and at a decent price point. It was also a perfect time for a crepe restaurant as like fondue, crepes were all the rage in the 1970's. The thing that was interesting about the Pan looking back was that all of the food was cooked on site with real recipes. This required a staff of cooks to be behind the scenes at all the locations and was not a cheap way to do business. Amongst the many reasons for the demise of the chain was the rise of sit down restaurants like TGI Friday's and Applebee's that offered a full service bar and menu with a central commissary supplying the chain. This meant cost savings on site and guaranteed that that food was the same everywhere. Interestingly enough this concept was pioneered by Howard Johnson's, who with Jacque Pepin at the helm produced frozen entrees which could be uniformly served all over the US.

Eventually through falling revenues and customer base the Pan collapsed. Interestingly enough the last Pan to close was the Mclean Store where I worked. A testament to Sue the manager and eventual owner I understand, who ran a tight ship and kept it afloat!

Even as people turned away from the Magic Pan because of trends so today people are looking back and recognizing the value that the concept had  not only as a novelty but as a place and a culinary experience. Whether the scene of many a boozy lunch by the ladies of Mclean or candle lit dinners for couples in love in the evenings, the quiet elegance and french country charm enveloped the diner in a world beyond the Mall and beyond their own. Upon entering the Tyson's Pan one was struck by the charm and sophistication of the surroundings. The excellent service and of course the tasty and interesting food. Food which for the time was new, foreign, and different. Before food TV, Media, food blogs and the internet., Americans were new to many of the foods the Magic Pan was serving.
And many look back with fondness to the time and place they discovered those foods for the first time. The Magic Pan.

For me the Pan was a great place to work, filled with a fun and interesting cast of characters. I learned a lot form those folks. Many of them were full time employees, I was the summer help but we all got along and they welcomed me and Kai into the fold with open arms. Salty and Rough they were the workers who make this country great. They worked hard and they played hard. But as a group they were awesome to spend that summer with. And this was where I learned that food service comes with a healthy serving of humor, cause people are very funny when it comes to their eating habits and the things they say about food. For example a young couple came in and was obviously on a date. Trying to be proper and order for his date the young man announced to me that... "she will have the St. Jacques "Creepie" and I will have the Beef  and Mushroom "Creepie"", mispronouncing the word "crepe". Well as you can imagine it was hard to keep a straight face, and the crew referred to the crepes as "creepies" the rest of the summer. Lots of milelage from that one. Ah, but it's the little things that make life fun!

Now to the food. There were serveral dishes which made the Magic Pan famous and there are people who would disagree which were their favorites. There was of course the famous Potage St. Germain, or french country pea soup served with a dallop of sour cream and a mini decanter of Sherry wine. There was the Orange Almond salad. Amongst the crepes were the chicken and beef and seafood options and then there was the famous Monte Cristo Sandwich which to this day I have never had duplicated.                      ( Although I hear Bennigan's ripped off the recipe). Then there were the saute pans, with veal picatta and fettucini Carbonara         ( Still my favorite version ever). And lastly the desserts. All excellent washed down with the Pan's excellent Bloody Mary!

But today I can't think of another Pan recipe I would rather recreate than the famous Potage St. Germain. Now finding the exact recipe for this was very difficult indeed but I did find it. I got a copy of the original cooking manual and here it the recipe. If you try it you will enjoy it! Yum! So Enjoy ya'll.


THE MAGIC PAN POTAGE ST GERMAIN

1 (1 lb) ham bone 4 1⁄2 cup water 
1 (13 oz) can chicken broth
 2 cups split peas 
2⁄3 cup finely chopped leeks or green onions
 1⁄3 cup finely chopped carrots 
1⁄3 cup finely chopped celery
 1 tsp granulated sugar
 1⁄2 tsp garlic powder
 1 tsp salt 
1⁄4 tsp thyme 
1 bay leaf
 1⁄2 tsp pepper
 21⁄2 cup milk
1 cup whipping cream 
1 cup chopped ham, cooked
1⁄2 cup chopped chicken, cooked (optional)

Place ham bone in large pot.
Add water, chicken stock and peas and bring to a boil over medium heat. Reduce heat and simmer, stirring occasionally for 30 minutes.
Sauté the onions, carrots and celery just until limp.
Add them to the soup pot along with all the seasonings and continue to simmer until peas are very soft and mixture is thick—about 45 minutes. 
Remove ham bone. Gradually stir in the milk and cream. 
Add ham and chicken. Simmer, stirring occasionally, about 10 to 15 minutes.

Potage St. Germain soup should be served with a dollop of sour cream and a splash of sherry. The sherry was served on the side in a tiny glass pitcher, while the sour cream was placed in the bowl and dusted with chopped parsley.

Tuesday, April 14, 2015

Broccolli Cheese and Dill Pickle Soup.

This soup came about because I had a lot of dill pickle juice in the fridge. I have seen dill pickle soup recipes on blogs like Noble Pig before but I wanted a slightly different soup. So I was making broccoli cheese soup one day and added some dill pickle juice. The combination of the broccoli with the dill pickles is something totally unexpected and kind of amazing.  I have made this now as a full blown recipe and I find it's really tasty.

If you want something delicious and unique give this soup a try I promise you'll love it!! Enjoy!

Broccoli Cheese and Dill Pickle Soup

Ingredients:
makes 6 servings

1 large white onion diced finely
1 cup diced carrots
2 lb broccoli florets chopped (can be frozen but thaw before using)
1 cup dill pickle relish
1 1/2 cups beer ( Wisconsin lager ) at room temperature
4 cups chicken stock ( have some extra on hand in case it needs thinning out)
2 cups dill pickle juice
1 cup dehydrated potato flakes 
1/3 cup flour
1 stick butter
1 cup milk
   salt to taste
2 teaspoons black pepper
2 tablespoons of worcestershire sauce
1 teaspoon mustard powder
2 dashes of nutmeg
2 tablespoon Franks hot sauce
1 1/2 cups grated sharp cheddar cheese
1 cup grated swiss cheese
1 cup sour cream

Method

Melt  1/4 stick butter over medium heat in a heavy bottomed stock pot and add the onion and carrots.
Cook onion and carrot till soft but not brown. 
Add rest of the butter to melt.
Place milk in the microwave and heat till warm but not boiling.
Add flour to the onions and carrots and cook making a roux until it is slightly blond.
Slowly whisk the milk into the onion butter mixture and let thicken
Add dill pickle relish
Heat chicken stock in a pot and slowly add in.
Pour in the beer and stir to combine
Add in potato flakes
Add in cheese a little at a time whisking till incorporated and smooth and thick
Add in dill pickle juice stir to combine
Add in broccoli and cover.
Let simmer for about 20 mins until the broccoli is tender.
Add in spices and season with salt and pepper to taste.
Turn off heat. Let soup sit for 10 mins.
Then pour half the soup into a blender
With top on and holding with a towel blend the soup till pureed and smooth
Add back into the pot with the other half of the soup and stir to combine
Reheat to serve. 
Serve with crusty bread and top with a dollop of sour cream and a little more grated cheddar. Enjoy!!!


Saturday, March 28, 2015

Eisenhower's Famous Quiche

My Grandmother Irene left a cookbook written in her hand in a bound notebook. A collection of recipes which were original and created by her.  Family recipes she wrote down. And recipes she obviously found in newspapers and magazines.

Several of them are from famous people's kitchens or special events that were documented in the media of the day. She had for example a recipe for the chicken salad that was served when Queen Elizabeth II came to the states to visit. And this recipe from Mimi Eisenhower who apparently made it often for the President.

This was such a common practice and I am sure that many ladies of the day did the same thing. It would be a fun activity especially if you have kids to go back through these collections of recipes and look at what your Grandmothers were interested in or what they were cooking. Finding a window into their lives in a way that we don't normally see.

This recipe is actually really good. I have made it several times and really enjoy it. I hope you do too.
Enjoy Ya'll!


Eisenhower's Quiche

For the Crust:

Conbine:

1 Stick Margarine
1 3 oz package cream cheese
1 cup of flour
2 tablespoons of water

Place in a food processor and combine
Press the into a 9 inch pie pan

Filling:
Ingredients:

3 Eggs
1/4 cup grated onion
1/2 lb grated swiss
1.2 pound grated cheddar
1 cup cubed ham
8 slices crisp bacon crumbled
1 cup milk
1/2 cup sour cream
1/2 cup cottage cheeese
1 Tablespoon flour

Method:

Combine dry and wet ingredients separately then combine and pour into the pie shell

Bake for 45 mins at 350 degrees let cool for 10 mins before serving.


Tuesday, January 27, 2015

How my Grandmother Learned not to Starve and make Her Chinese Cucumber Salad Recipe

In 1970 my family moved to Hawaii from Jacksonville Florida. It was our third time living in Florida and the move to Hawaii was an exciting and really big adventure for us.

One of the biggest changes was that my maternal Grandmother who we referred to as "Grandma" to differentiate her from my Father's Mother who was called "Big Mama" by the family, came to live with us. That is she moved out of the home she had at the girls school where she was the schools dietitian and ran the kitchens and dining program, and moved in with us to take care of my brother and I while my Mom went back to work teaching.

As a Navy family we were packed up and ready to go in no time at all. My Mom was a master packer and organizer. And my Dad was not too bad either so between the two of them we were so ship-shape when the packers came to put things into the giant Wooden containers which would be shipped to Hawaii, they were shocked as to how easy their job was because of my parents prepping everything. So after the packing the entire contents of our home into brown cardboard moving boxes, each carefully labeled with room and contents as overseen by my Mother, these boxes where placed inside of huge the wooden crates. The purpose of which was at the time two fold. One was to pack them into containers to ship more easily. But the other reason was that once these boxes arrived in Hawaii they would undergo an extermination gassing which was to help eliminate  any non native pests which was a major concern of the Hawaiian State Government. I was more interested and fascinated by the Mayflower moniker on the moving truck, which I somehow thought tied our family's journey to the historic Pilgrims and a journey to a new world. And believe me when I say Hawaii was a new world to our family, it was really truly was.

Nothing could have prepared us for what we would find in all sorts of experiences in Hawaii. We had some of the most powerful cultural, spiritual, and educational experiences that would shape our family and change the way we saw life and even ourselves.  It was a very different world from the Islands today. Still in the development phase of what the Islands would become. For example we were there when wild fields and farms still populated parts of Oahu. In fact there was a famous watercress farm which was under siege by developers the entire time we were in Hawaii. Rather a famous story. Seems the farmer did not want his farm developed and to ensure this upon his death he divided the farm up among every living relative in his family equally. Which apparently was hundreds of people. Thus insuring that it would never be sold.

Hawaii gave our family some amazing experiences. Many of which were introduced to us through our Church. Through Navy friends we were introduced to Trinity United Methodist Church up the hill from us in Pearl City, a suburb of Honolulu.  Now my family was a mixed family religiously and remained so till we moved back to Charleston and ended up in the Episcopal Church and subsequently an offshoot in the form of the French Huguenot Church in downtown Charleston. Which my parents were impressed by because of the amazing Pastor and the fact that the members were so wealthy and so generous that the church never asked for money in the services, ever. Of course there were other great reasons too and great community but that aspect was something to note because it showed such commitment to the church. So how did we end up in the Methodist church for several years? Well now my father had grown up Episcopalian and Baptist and my Mother had grown up Catholic and Methodist. So when they got married they got married in a Methodist church because it was where my Grandparents on my Mother's side belonged and where my Mother had been very involved in the young Adult fellowship. I had asked my Father one time after visiting my Uncle's Baptist Church, where I remember lots of singing and yelling, what the difference between Baptist and Methodist was. And at the time like the ex-Episcopalian he was his answer. "Well Farley, Methodist's are like Baptists that can read". Yes, I loved my Father's sense of humor.

So the other part of the title of this chapter is "How my Grandmother learned not to starve". Well let me explain. So a year or so after we had lived in Hawaii my Grandma decided she needed to get out and learn something. And since she had a culinary background the obvious thing would be a cooking class. So she opted for a course in Chinese cooking that one of her friends introduced her to. So she did indeed learn how to cook alot of really great Chinese food. Some of these recipes I will be disclosed here. But the reason she felt so compelled to learn how to cook Asian food in general came from an experience she had in Japan.

So my Grandmother was actually one of the founding members of Hawaii's first senior citizen social group called the Silver Bells ( Which happened to be her favorite Christmas Song ). And one year the group which included many Asian members decided to take a trip to Japan. The trip which was excellently organized by the Japanese lady members of the group was an amazing experience for my Grandmother. There was just one problem. She came home from this vacation having lost 15 pounds. Why you might ask. Well the answer might surprise you. See in Asia most meals for groups are actually eaten family style. So when they would serve meals on this tour everyone would grab their chopsticks and dig in. Well Grandma did not know how to use chopsticks very well. So by the time she got a few bites in her tour comrades devoured the rest of the food. So she actually lost weight on this vacation! But boy did her chopstick skills improve!

So this recipe is really one of the recipes she learned in the Chinese Cooking School. One of the joys of  sharing this recipe is that is comes from notebook in her own hand that my Mother has kept. There is something really special about sharing her recipes that I am reading in her own hand. It's one of those things that I think is something that speaks directly to my own personal food heritage. I mean I read her recipes and notes written in her own hand. I make this dish and my Grandmother is there serving Egg Foo Young and Chinese Spare ribs. Telling me things about life I would learn no where else. She's in every bite and I am so glad she taught me how to cook and love through food.

So here is her Chinese Cucumber Salad recipe. It's simple and so good. So next time you want to kick up your cucumber salad try this and be happy that my Grandma survived her vacation to teach us how to make this salad.

Irene's Chinese Cucumber Salad


  •    2 English cucumbers, tough skin removed


    • 3 cloves garlic, crushed and minced


    • 1/4 teaspoon red pepper flakes


  •   1 tablespoon Chinkiang vinegar (or rice vinegar)


  •   1 tablespoon light soy sauce


  •   1 teaspoon sugar


  •   1/2 teaspoon salt


    • 1/2 teaspoon sesame oil


    • 1 tablespoon mixed black and white sesame seeds


    • 1 scallion white and light green parts sliced on the bias 


Method:

Cut Cucumbers into very thin slices
Mix all other ingredients in a bowl
Right before serving pour the dressing over the cucumbers and mix well
Mix in Sesame Seeds and garnish with the chopped scallions