Sunday, October 7, 2012

Football Recipe Corner, Chili Dogs or Virginia is for Hotdog Lovers


So last fall I wrote about how Williamsburg, Virginia is one place that forever will represent Christmas time. But Virginia in general will forever be for me the state where I first lived in four seasons and learned to love them. Before that my family had always lived in warmer climes. Being about 10 when we moved to a wintery place for the first time it was quite a revelation. I attended high school in the suburbs of Washington DC. and when I went away to college it was to James Madison University. A school of about 4000 students at the time, JMU sits in the middle of the Shenandoah Valley in a small hamlet called Harrisonburg. No longer small, the school and the town have grown up quite a bit. But when I was there it was still very rural and very redneck. In fact I was surprised by how conservative the school and the student body was upon arrival there. It was certainly not what I had expected a university to be like. I had thought it would be very Brideshead Revisited but JMU was more like Frat City than Oxford. Frats, Beer, "fraternizing", and of course Football were all high on the agenda. Well that and tailgating, which was sort of one and the same. And tailgating meant tailgating food!

Fall of course also meant the beginning of the school year and so during the first semester I enjoyed the fall leaves changing around me and in the Mountains above us. Signaling natures shift into the colder part of the year. And of course at JMU, that same climate change meant Football Season!! Now tailgating  and eating was big and great for the pre-game, but for those who wanted something after the game there were only a few options.

Back then Harrisonburg was a small town and as such the local eateries were mostly well...local. That was good because that meant that the big chains had not yet moved in yet. But after the game you want something that you can eat that says grilled goodness and comfort ya'll! And I mean what says football season and fall more than a chili cheese dog! Well that and it's also good for soaking up all that beer you had during the game. I had come to college knowing a thing or two about chili cheese dogs from places in Virginia near my home. But my college experience gave me the third establishment in the trinity that shaped my hotdog chili cheese making recipe. Let me tell you about those places.

The one college place that really to this day will not be rivaled for fall football loving, beer soaking up, after frat party Friday night food is Jess' Quick Lunch, a chili dog place. For atmosphere alone it was amazing, formica floors and countertops, bright florescent lights, stainless steel fixtures and the chili dogs which were grilled came unadorned except for the ketchup and onions. They were good and quick and greasy in the best way. But they were the second chili dog I had had in Virginia. The first of my adventures in Chili dogging came from the very famous Vienna Inn in the northern Virginian town of Vienna, Virginia.

                                             Jess's QuicK Lunch

Now the Vienna Inn makes the most amazing chili cheese dogs on the planet, no....really. And it was my brother Chris who turned me onto them. he worked down the street at a very famous camera shop called what else, Vienna Camera. Well the employees would get lunch at the Inn regularly. He called them "Death Dogs", and we called them good!

As it states on the Inn's website:


Opened in 1960, the Vienna Inn is a staple in the heart of Vienna, Virginia. Youthful placemat art on the walls and teeming trophy shelves demonstrate the family-friendly nature of the establishment.
The menu also has something for everyone. Seafood lovers will enjoy the spiced shrimp or the blackened tuna sandwich and those looking for something lighter can find nourishment in the grilled chicken salad.
It is chilli macs and chilli dogs that the Inn is most famous for - and rightly so. Selling over 10,000 chilli dogs every month you would be remiss to pass up a loaded dog, complete with chili, cheese, spicy mustard and diced onion.
The Vienna Inn's unrefined charm has made it a steadfast landmark that may grow older, but has not aged a day.

Yes the Vienna Inn has amazing Chili Dogs. But there is one more American hotdog dining icon that I encountered in Virginia and remains to be discussed and has formulated my way of making hotdogs and that icon is LUMS.
Now LUMS was a chain which grew out of south Florida and expanded all over the country. They were most famous for the Ollie Burger, which many proclaim to this day as one of the best burgers ever made. And they were known for their Hotdogs which were slow cooked and held warm in beer, a nod to the midwestern manner for preparing brats. They were also famous because they were one of the first "family restuarants" to serve alcohol. I can remember getting a "Schooner" of beer at LUMS across the way from the Magic Pan when I was 18 years old. 

So that brings us to making tailgating dogs today the Ole Virginny way! The way I learned to make them based on the techniques of the three establishments that I encountered in the great state of Virginia as a young man. I have merged the preparations to come up with Forrest's Ultimate Chili Cheese Dog. So clearly the chili is what makes a great chili dog and have I got a great recipe for that. Check this one out. Enjoy, Ya'll!

Forrest's Ultimate Chili Cheese Dog (based on three Virginia Hotdog Icons)

Forrest's Hot dog Chili: ( this is no joke ya'll ) 

3 tablespoons Chili Powder
2 teaspoon ground cumin
1 teaspoon paprika
1/2 teaspoon allspice powder
1/2 teaspoon ground cinnamon
1/2 teaspoon cayenne pepper flakes
1/2 teaspoon salt
1/2 teaspoon black pepper
1 bay leaf
1 tablespoon Butter
1 large onion finely minced ( food processor minced)
2 gloved minced garlic ( I use the jar )
1 1/2 pounds ground beef ( Chuck )
1 8 oz can tomato sauce
1 4 oz can tomato paste
2 tablespoons Worcestershire sauce
1 tablespoon yellow mustard
1 tablespoon apple cider vinegar
2 cups water

In a bowl combine all the spices
In a pot add the butter and onions and cook over medium heat till translucent add garlic and let bloom
The to this pot add the spices and let cook with the onions and garlic to bring out the flavors but don't burn. Then to this pot add all your wet ingredients and stir to combine. Bring to a boil for 2 to 3 mins.
Reduce heat down to a simmer and add the beef with your hands breaking it up into bits
Stir and let cook down for an hour with a lid on. Stir occasionally and then check for seasoning. Then remove the lid and simmer down till most of the liquid is gone but the chili is till nice and moist. 

For the hot dogs

You will need
1 package all beef hotdogs
1 package Hotdog Buns ( nice quality maybe potato rolls )
2 cans of lager beer
2 cups water
1 large white onion
8 oz finely shredded yellow sharp cheddar cheese
Spicy brown mustard
Mayonaise


Take a stock pot and pour water and the 2 cans of lager beer into it. The cheaper the better. Add 1/2 of an onion that has been cut in half, chop the other half for topping the hotdogs. Bring to a boil then reduce heat to low and simmer. Place 1 package of good quality all beef hotdogs in the pot and let simmer for about an hour while the chili is cooking. When ready to serve  you can grill the dogs in a pan or on the grill again to crisp or serve right out of the beer broth. Your choice.

Serve the dogs as such:

Take a Bun open it up on the bottom give it a squirt of spicy brown mustard and a squirt of Mayo
Add the Hotdog
Top with the chili
Top with chopped onions ( white )
Top with the cheese
Serve and enjoy!



Friday, October 5, 2012

Magic Pan Spinach Salad The 1980's Superstar Salad Revisited

Spinach Salad is one of those dishes that has had an interesting history is the American culinary landscape. There are many manifestations and versions of this salad some with warm bacon dressings and some with cold tart or sweet dressings all designed to compliment the flavor of the base of the salad which is the spinach leaves themselves.

Spinach salad as we know it has it's roots in the Pennsylvania Dutch country of western Pennsylvania's rolling farm country in Lancaster. The "Dutch" as we call them really came from the word "Deutsch" or German so we really are talking German food roots here when we look at their cuisine. And what a building block of American Midwestern cuisine it is. Pot roasts, noodles, potatoes , layer cakes, strudels, and even cabbages and casseroles are all part of the rich culinary heritage left us by the German settlers of this country.

The Pennsylvania Dutch in particular had the emergence of the mushroom growing farming industry in their backyard which grew up and prospered in that area until today. Alton Brown speaks about the likely hood that spinach and mushrooms found themselves together in this part of the country easily and that the salad that grew out of it based was on a hot bacony vinegar dressing that was prevalent in German cooking. That this occurred is really no accident given that German cooks used this kind of dressing for a variety of dishes, and the flavors really help to make ordinary vegetables sing!

Now I am familiar with this kind of dressing and this kind of spinach salad given that my Grandmother and Mom came from Chicago, another very heavily German influenced food town. But my real introduction and love of spinach salad came from my time spent working at the Magic Pan Restaurant in Tyson's Corner, Virginia back in the 80's as a student.


Now if you have been reading my blog you will know that I have referenced the Magic Pan Restaurant before. But for those of you who have not been a brief story.


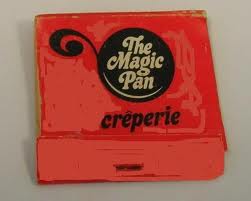
The Magic Pan was a restaurant chain started by a Hungarian Couple , the Fono's in San Francisco in the 1970's. The original concept had been an Austrian style crepe restaurant mostly with recipes from Mrs Fono's family background. There were Ham crepes and Spinach crepes and chocolate and Strawberry crepes for dessert.

The business expanded and was purchased by Quaker Oats in the 1980's. They took the concept expanded it to a french country kitchen concept and rolled it out across the nation. The center piece of each Magic Pan was the giant tile enclosed Crepe Wheel which spun around and cooked the crepes and other dishes while the customers looked on. I remember as a 12 year old being taken to the Pan and being just mesmorized by the giant cooking wheel of crepe goodness! It was one of the first "chain" restaurants in the country in a time when the US was just beginning to discover different foods. The Pan delivered that and at a decent price point. It was also a perfect time for a crepe restaurant as like fondue, crepes were all the rage in the 1970's. The thing that was interesting about the Pan looking back was that all of the food was cooked on site with real recipes. This required a staff of cooks to be behind the scenes at all the locations and was not a cheap way to do business. Amongst the many reasons for the demise of the chain was the rise of sit down restaurants like TGI Friday's and Applebee's that offered a full service bar and menu with a central commissary supplying the chain. This meant cost savings on site and guaranteed that that food was the same everywhere. Interestingly enough this concept was pioneered by Howard Johnson's, who with Jacque Pepin at the helm produced frozen entrees which could be uniformly served all over the US.

Eventually through falling revenues and customer base the Pan collapsed. Interestingly enough the last Pan to close was the Mclean Store where I worked. A testament to Sue the manager and eventual owner I understand, who ran a tight ship and kept it afloat!

Even as people turned away from the Magic Pan because of trends so today people are looking back and recognizing the value that the concept had  not only as a novelty but as a place and a culinary experience. Whether the scene of many a boozy lunch by the ladies of Mclean or candle lit dinners for couples in love in the evenings, the quiet elegance and french country charm enveloped the diner in a world beyond the Mall and beyond their own. Upon entering the Tyson's Pan one was struck by the charm and sophistication of the surroundings. The excellent service and of course the tasty and interesting food. Food which for the time was new, foreign, and different. Before food TV, Media, food blogs and the internet., Americans were new to many of the foods the Magic Pan was serving.
And many look back with fondness to the time and place they discovered those foods for the first time. The Magic Pan.

Among of the super star dishes of all those boozy lunches by the "Ladies who Lunch" of Mclean Virginia was an assortment of salads. Two of the most popular where the "Orange Almond Salad" ( very Californian) and the Pan's version of this classic spinach salad. As with most of their dishes the Pan put their own twist on this dish. The Pan's take on this salad grew out of two factors I would guess. One was that the chain was a California based company. So the idea of salads as a meal was something very Californian. This also influenced the type of ingredients the salad had. I mean it's not complicated. Spinach, Mushrooms, Bacon, Eggs. But instead of doing a warm bacon and egg dressing like it's German forbearers the Pan took a more refined French/Californian approach to the salad dressing it with a really nice mustardy vinaigrette.

Regardless the result was something easy to prepare in the kitchen at the Pan and easy to prepare in your kitchen now. So take a look at this version of an old American standby and give it a whirl, it's an oldie but goodie revisited but with an emphasis on a goodie! Enjoy Ya'll!  


SPINACH SALAD (Based on my recollection of the Magic Pan's recipe)

Dressing:
 1 cup vegetable oil
 1⁄2 cup tarragon wine vinegar
 1 tsp dry tarragon leaves
 3⁄4 tsp salt 1⁄8 tsp pepper
 1 tsp sugar 
 1⁄2 tsp Dijon mustard

 Combine all ingredients except oil. Slowly whisk in oil.

Salad:
 Fresh spinach
 Fresh mushrooms, sliced
 Chopped bacon 
 Chopped hard-boiled egg

Wash and dry spinach leaves. Sprinkle mushrooms, chopped cooked bacon and chopped hard boiled eggs over spinach. Toss with dressing.


Wednesday, October 3, 2012

New American Cooking, Roasted Oysters a Low Country Tradition


Fall in the Low Country of South Carolina was always my favorite time of the year. It always means along with the cooler temperatures people gathering for local events and social season galas again after the long hot Summer months. It also means a return to Oyster Season and one of the great traditions of the Low Country, the Oyster Roast.

Now Oyster Roasts are sort of the fall version of a Pig Picking in the Low Country. A gathering for any reason and a feast based on the bounty of the beds which line the offshore waterways of coastal South Carolina and Georgia. Traditional roasts take place out of doors in the evening and always involve communal eating tables and lots of beer. Oysters are usually brought up in big crusty bunches called and are placed in a large oyster roaster which is typically a metal barrel on it's side with a heating element under it or coals inside of it with a grate to hold the oysters above the heat wet burlap bags are placed over the oysters to cook them by literally steaming and roasting them in their own juices. Pretty spectacular as far as roasting goes. They are then brought to the table in big clumps and with a hammer and a shucker guests are invited to help themselves and feast on the bounty of the sea before them. Today there are large mobile oyster roasters which travel around and position themselves where ever the party is and provide the services needed to cook the oysters for the dinner. They look kind of like huge BBQ trailers and are backed up near the action to provide culinary drama as well as the facility to roast the oysters. All in all, oysters served up with cocktail sauce,hot sauce and copious amounts of beer are the order of the day. ANd please someone tell me what could possibly be wrong with that!!! These meals are usually accompanied by all the usual suspects. Bowls of cole slaw and potato salad and baskets of cornbread or biscuits adorn the table. But the real star of the show is of course the oysters themselves.

Recently, I attended a brunch with my friend Melissa at Ditch Plains a bar/restaurant in NYC and we ordered the roasted oysters as a starter. It came on the half shell swimming in an herb garlic sauce and toasted baguette under each oyster. It reminded me of the roasted oysters I have had in Florida while working at Seaside Music Theatre in Daytona Beach Florida several years ago now. And as Melissa and I spoke about it I remembered having a similar dish at home which might have been made by my Grandmother with Smoked Oysters in a chaffing dish and served with toasts. But regardless, I knew I would recreate these in some fashion at the West 20th Central Kitchen.

So in planning this I decided that I wanted to make this as a starter dish and make it pretty easy. By that I mean that you know I don't like to work hard to get seafood out of shells. So I wanted to make this from shucked oysters and make it in a scallop shell. However, I thought that the idea of a garlic compound butter and toasted bread sounded kinda amazing! So off i went.

Just for the record I love scallop shells. They are so old school and so elegant in my mind. They were always around when I was little for special occasions. Plus the rich lovely seafood dishes prepared in them came to the table right out of the oven piping hot and brimming with goodness. Cream sauces, or crusty buttery bread crumb toppings over scallops, oysters, shrimp, crab, or even lobster. They were the stuff of special occasion meals or holiday dinners. They were the things of crisp white linen tableclothes, sparkling glassware and dancing candle flame. In short something special.

So here is my redition of a home oyster roast. Done in a scallop shell and baked in the oven with all the garlicy, buttery goodness of a french seafood preparation. I hope you try it for one of your special occasions or just a week night when you are feeling adventurous. Enjoy Ya'll.

Roasted Oysters in Garlic Compound Butter

1 pint fresh oysters
4 to 6 scallop shells ( baking shells depending on the size of the oysters)
2 tablespoons minced garlic
2 tablespoon minced fresh parsley
1/2 stick of butter unsalted at room temperature
1 teaspoon salt
2 teaspoons white white
1 teaspoon finely minced shallot
1 box rock salt

Method:

Mound some rocksalt on a baking sheet
Place the scallop shells in the salt to keep them level
Drain Oysters and divide among the scallop shells
Cream butter and other ingredients together
Divide the butter in big dallops among the Oyster Shells
Place into a preheated 375 degree oven
Bake for 5 to 7 mins
Then broil for 2 mins till oysters are browning in the butter

Serve with slices of lightly toasted baguette  Enjoy!


Thursday, September 27, 2012

Football Season Love or Frito Pie for Football Lovers! or Texas Chili and Chips

So inspired by my previous Frito entry and how many people on google seemed to have picked this up, I will give you a little more Frito football season love.

So I can't take credit for this dish at all. Perhaps my friend Trisha Bastion can but even she good Texan that she is may shy away from the credit. Or my friend Daryl another Texan might also take credit for introducing me. But either way I cannot, nor would I pretend to take credit, because Frito Pie is as famous in Texas and Southwestern football as beer and tailgating.

Frito Pie, the very name conjours up all sort of interesting images. Not immediately gourmet ones and not ones directly about football perhaps, but who care's this is all about good eats we are talking about. I mean if you have ever been to to great fall football game? You know the deal. Nip in the air, crowds of excited onlookers and fans moving about. Colors and scents of Fall are everywhere. The cool air and sweater clad co-eds and boys in jerseys or sweaters and hoodies. Cars lined up in the parking lots with BBQ's going and beer beer beer! Yeah team!

Well in Texas and the southwestern parts of our nation a big part of high school football games and team fundraising for at those games I am told, centers around Mom's selling food at games. Frito Pie in particular is a big seller. It's not a fancy thing. It's basically a bag of fritos that gets opened up and they ladle chili and cheese all over inside the bag then they hand you the bag and a fork and you go to town! Yum right.  I mean what could be bad about that.

But who came up with this? Well the story goes it was invented at a Woolworth's lunch counter in Santa Fe, New Mexico. There is even a recipe for the original chili online you can check out if you want. There is also a story that in the 1930's the wife of the President of the Frito Lay Corporation invented it. But either way we are all the winners cause someone came up with it.

So here's my take on the Frito Pie, it's a little more work than just opening up a can, but hey that's why we have recipes. This also includes my recipe for authentic Texas chili ( aka no tomatoes). Enjoy Yall.

Forrest's Authentic Texas Chili and Frito Pie Recipe

For the sauce:

1/4 cup butter
1/4 cup flour
3 Tablespoons Garlic powder
2 Tablespoons Ground Cumin
2 Tablespoons Dried Oregano
2 Tablespoons Dried Coriander
1 teaspoon cinnamon 
1 Tablespoon Kosher Salt
1/2 Cup Red Chili Powder ( I used a mix of regular Store Brand Chili powder and ground Guajillo Pepper powder and Ancho Chili powder in equal amounts)
31/2 cups beef broth
1 bottle of lager beer

For the chili:
2 strips of bacon diced
1 pound Beef Brisket cut up into 1/2 inch cubes
1 large white onion diced finely
1 can green chilis
2 Tablespoons of hot Coco Mix with sugar added.
2 Tablespoons cornmeal baking mix or Masa

Method:

Cook the bacon add the onions over low heat until browned and the onion is soft then add the beef and cook till browned
salt to taste

In another pan:

Melt butter and stir in the flour
Let cook for a few moments then pour in the other dry ingredients
Cook till starts to smoke stirring constantly
Then add the beef broth slowly combining the mix
Add the cocoa 
Then add the beer
When combined let it come to a bubble and boil
Cook for 5 mins stirring often
At this point you are done but to get more combined complex flavor to can
reduce heat to low and simmer for 20 to 30 mins
If it gets too thick add more broth or just water
It should be thick and delicious
Add salt to taste if you like it more salty add it
Add the meat mixture to this and the can of chili's and the Masa
Cover and let cook over low heat for 3 hours together adding water if it gets too dry.

Frito Pie

In a 9 x 9 baking pan  or in individual gratin dishes layer about 2 cups of fritos on the bottom
Top with a layer of the chili ( as much as you want)
Add chopped raw onion and tomatoes
Top with a layer of grated cheese ( I like white cheddar)
Bake in a 350 degree oven till cheese is melted and everything is good
To serve place portion on plate and garnish with sour cream, chopped cilantro, jalapenos and radish sticks for crunch and color. Enjoy Ya'll and GO TEAM!!!


Monday, September 24, 2012

Waffle Iron Grilled Ham and Cheese

When I was growing up weekends meant big family breakfast on Saturday. And Breakfast on Saturday meant Pancakes or Waffles. For years my mother and grandmother carried on this tradition. We had a waffle iron older than my mother I think and it pumped out some amazing waffles meals. I mean who didn't love getting up in the morning on the weekend when you had no school and or work and having a great breakfast with all the accompaniments.

So the other day I went out to brunch and I had a great sandwich. We tried this new French place on 7th Ave. The sandwich was a Croque Madame. It was amazing! So buttery and crunchy and crispy. It was awash in bechamel sauce and it was so yummy! I was immediately inspired!

But what do waffles and a croque Madame have in common. Well the answer is not exactly clear but I will try to explain.

As I have said before one of my summer jobs that left a culinary impression on me was my time spent at the Magic Pan. Now the Magic Pan for those of you who have not been following my blog was a chain in the 70's and 80's that had as it's main focus crepes and such. But was also known for a particular Sandwich, the Monte Christo.

Now there are sandwiches and there are sandwiches, but this was a SANDWICH! Let me explain. The Monte Christo as a sandwich is a turkey, ham and swiss cheese sandwich prepped on white bread. It is generally dipped in a egg batter like french toast and grilled. Well that was fine for most Monte Christo's but the Magic Pan had to do one better. So they not only put it together on texas toast but they deep fried it after it was dipped in an egg batter. The resulting sandwich was the stuff of legends, cause everyone loved that sandwich! I mean there are still people including my friend Fred Tessler of the Denver Tesslers, that proclaim it as the absolute best sandwich they ever had!

I mean the Pan made a lot of excellent foods and it was really the first place that many Americans came into contact with the foods Julia Child had been talking about on her TV. show all those years. Now granted it was somewhat americanized but that not withstanding the Pan really did inspire and educate people about foods they otherwise would have missed out on.

So that brings us up to speed. Now believe it or not I am in possession of the rare copy of the Magic Pan's kitchen handbook with all the recipes. So I can tell you exactly what went into the Monte Christo.  But It really was pretty much the sandwich I described earlier just deep fried. Today though I am not in the mood nor do I have the room and ventilation to fry a sandwich. However I did think up a great idea for cooking sandwiches a special way and that is on the waffle iron. My roommates in college did this a couple of times with plain grilled cheese but the idea never stuck till now. The French toasty sandwich gets pressed in the waffle iron instead of a panini press. Its a fun way to make your brunch at the table while people are snacking on nibbles before the main meal.

So I came up with many versions of the sandwich that would be really fun to make on the waffle iron. These are super simple to make and what is really fun is you just need to give people various ingredients and they can make their own "Sammy"

For my version you need the following

8 pieces of white toasting bread, can be Texas Toast bread if you want.
4 slices of Ham
4 slices of turkey
8 slices of swiss cheese
either homemade bechamel sauce cooled down to a thick paste or mayo
Melted butter
4 eggs mixed well with 1/4 cup of half and half 5 Tbls, flour and a pinch of salt

Layer the ham turkey and cheese
slather the bread with a tablespoon of bechamel or Mayo
a twist of nutmeg
a twist of black pepper
make a sandwich and secure with a toothpick or two
dip into the batter quickly on both sides and place on a lined tray
Place in the fridge for 30 mins at least
Heat waffle iron
When hot, take the sandwiches and brush with the melted butter and press then gently in the waffle iron. if you have large one you can do up to 4 at a time. Grill till golden.
Serve warm with dijon mustard and  raspberry preserves. Enjoy


Saturday, September 15, 2012

Football Snack Time, Sausage Balls and the RNC 2012

OK it's college Football season and the weekend after the Republican National Convention this year I found myself in Chicago and was blessed to behold the rigor and forethought that people put into their celebrating their team's efforts starting out the season! I mean we are talking adults and whole families made up in colored costumes and even makeup putting on a show in support of their favorite teams.

Now I am not a football fan by any stretch of the imagination. I like watching the occasional game, if it is on in the bar and I will always watch the Superbowl and party down. But tailgating with my favorite university team wasn't something I did in college let alone now. Like Bruce sings "Glory Days", some folks need to just let it go! But OK, I get excited over a biscuit recipe or an eating experience, so I give it to others to be passionate about "the game"! Why not, to each his or her own. It's what makes the world an interesting place.

This year right before I got to the weekend in Chicago where I was attending a wedding, I was sent to Tampa, Florida for the RNC. Well not exactly, a big corporate client of ours was hosting a big pavilion down there and the caterer they had hired was not really up to the task, so down we went to lend a hand and keep their events running smoothly. Well, it did not take long for these New Yorkers to conflict with the local Tampa chefs and managers from this catering company. Long story made short we saved these poor people from being eaten by their tough NYC corporate customers. but it was not easy. During the week we had to deal with staff not coming, food not coming, entire orders being missed, or parts of orders coming and we having to cover the rest.

This post is born out of that senario. One day there was to be a cocktail party, but the caterer did not send Hors D-ouevres for the cocktail reception. So off to the store we went and rustled up some HD's. Well there were several suggestions but mine was sort of cheeky and made a big hit. Years before when I lived with 2 roommates ( Christopher and CT) one of them made this dish as a snack. Well I actually think it was a meal but I digress. It's an old southern recipe that when we made it made the client so happy. They were sausage balls. Now not fancy although we made them really small and they looked like an elegant HD at a NYC party. And we called them "Saucisson" or French for Sausage! But what they were made out of had us in the back howling. Ready, OK they were Bisquick, a Bob Evans sausage roll, and cheddar cheese. Mushed together in equal parts and wet with a bit of water they were rolled into tiny little balls which puffed up to double the size when baked quickly. Served with a dijon dipping sauce they were a hit!

So I thought why not represent for game time what was good enough for the Republican National Convention! Sausage balls! So if you want to delight your friends watching football make these and think of me cause I probably won't be there, unless it's the Superbowl! Enjoy Ya'll!

Saucisson or Southern Sausage Ball Game Day Nibbles ( of course you could make them anytime)

2 cups Bisquick Baking Mix
16 oz or shredded cheddar cheese can be pre-shredded but works better if you do it yourself
1 Roll Sausage fresh or frozen thawed
2 tablespoons water

Heat oven to 375
In a bowl combine well all ingredients using your hands (wash them)
Add more water if too dry but don't make it really wet.
Place in the fridge for two hours
Remove from the fridge and roll into marble sized balls
Place on a non stick baking sheet
When you have the first pan done bake for 7 to 10 mins. or until puffed and golden
Remove and let cool slightly before you remove them from the baking sheet.
Serve warm with the dipping sauce.


Dipping sauce

1/2 cup Dijon
1/2 cup mayo
1 teaspoon vinegar or lemon juice
1 teaspoon black pepper
1 teaspoon water

Place in mixing bowl and whip together serve with the Sausage Balls Enjoy!


Friday, September 14, 2012

Easy Roasted Olive Appetizer Plate using California Ripe Olives in the Can

I love an easy appetizer. Who doesn't. But sometimes we get in a rut and pull out the same old chips and dips and cheese and crackers we always do. Well I was recently at a gathering and thought I need to do something different. Something lighter and something tasty. Olives came to mind as one options. But how to make them more interesting than getting them from the deli olive bar and opening up a tub into a bowl? You know open a can! Well that got me thinking about olives in a can.

I really only knew there were 2 kinds of olives growning up. Green oilves that came in a jar with pimentos and California Black or Ripe olives that came in a can. Kalamata oilves and all the other varieties were just not on the tip of everyone's tongue in the US. when I was a kid. I didn't learn till much later the joy of the cultivated olive. When I did discover Greek Olives I was really blown away. The flavors and the textures were all so good and slowly I relegated the canned black olive to a culinary position which included mexican foods and salad recipes which called for them.

Recently I have been on a kick to try and reinvent uses for ingredients deemed old school or passe in the more modern kitchen. I used black olives for something the other day and thought they could be more interesting. I mean how is it that olives produced in the US. have this profile flavor-wise. Well I did some research and this is what I found out.

From the California Ripe Olive Producers:

The roots of the California Ripe Olive go way back. Wild olive (scientifically known as oleaster) once grew all over the Mediterranean, southeast Asia and other areas, but this unimpressive, straggly plant bore little resemblance to the graceful modern olive tree. That is, until about 5,000 years ago when it was first cultivated in Crete and Syria into the beauty as we now know it.

Once established, olive trees flourished in Spain, Tunisia, Morocco and other Mediterranean countries for thousands of years, featured in many of the regions culinary specialties. The Spaniards were the first to realize that this fabulous fruit could have international appeal and took the first cuttings to Peru in the mid-sixteenth century.
From there, Franciscan Monks took olives to the New World and moved north through the missions of Mexico. At last, in 1769, the first olive cuttings were planted in California at the San Diego Mission. As most transplants do, they responded quite well to the California climate-sunny days, cool nights, fresh air-and they set their roots.

Surrounded by such a cooperative climate, Californian’s started planting acres upon acres of olive trees in response to the high demand for olive oil in the 1800s. Then the market became saturated (with monounsaturated oil ironically) and prices dropped. Farmers who had used all of their land for olive oil were doomed if they didn’t come up with a new plan.

A resourceful German woman named Freda Ehmann and her son, Edwin, were part of this population. Who would’ve guessed that they would soon be the ones to figure out the solution? The Ehmann’s had trees that bore little fruit and selling pressed oil was not an option. After consulting with a Berkeley professor on processing methods, Freda began experimenting with 280 gallons of olives in barrels on her back porch. Thanks to her creative dreaming and stick-to-it-ness California Ripe Olives were created right then and there.
California Ripe Olives may not be prepared on the back porch anymore (in fact, we can assure you, they are always preserved in one of two state-of-the-art facilities), but they are made through the same exact process that Freda invented. This is what makes our olives taste decidedly American. Mild, versatile and meaty, they continue to add great flavor to everything from American country cooking to a melting pot of ethnic cuisines.

Who knew right? So obviously the flavor profile of these olives make them open to being used with other flavors to create something special. 
So having been to plenty of restaurants and events where a tasty olive bowl is available all mixed up with herbs some oil nuts and maybe garlic or citrus bits for flavor, I decided to make my own. However I would use the California Ripe olive out of the can!
So I did it. It was easy and it was well received. I used pearl onions, California Roasted Almonds ( staying with the state theme) some oilve oil, some garlic slices, fennel seeds, rosemary, sea salt  and of course California Ripe oilves. Stir it up. Saute lightly on the stove top then roast for 10 mins in the oven. Yum! So give this a try and mix up your nut bowl at the next party! Enjoy Ya'll!


Roasted California Ripe Olives with Almonds Onions and Herbs


preheat oven to 425 degrees

1 can 8oz California Ripe (black) oilves
4 tablespoons olive oil
10 pearl onions ( if frozen thaw)
1 large sprig rosemary leaves chopped
1 tablespoon fennel seeds
1/4 cup roasted almonds whole
2 cloves garlic sliced thin
Sea salt

Place oil in oven proof pan and heat over medium heat
add spices and allow to bloom a few minutes
add onions and cook till a little brown on one side
add the other ingredients and stir
cook for 3 to 5 mins then place into oven for 10 mins
take out and let cool on the counter, serve with bread.


Tuesday, September 11, 2012

7up Biscuits, Southern and No Joke Good!

Ok. I have to admit that sometimes I read the vast sea of recipes out on the internet and wonder, "who really cooks all of these"? I mean there are soooooo many out there. However, when I am researching a topic I try very hard to stick to classic ideas and recipe fornulas. In fact, I try to make up things myself, even if I find out later that my idea like so many things is hardly a new one or that someone has thought of before. Like they say there is nothing new under the sun!

But every now and then I stumble upon a recipe that I think, Really??? Oh come on, that's just ridiculous. And so it is with this one. I know it sounds crazy, but in this case it really is pretty AMAZING! No I mean could be the best biscuit I have ever made. I was just having a discussion with my friend Melissa at work and this came up. Well the subject of biscuits came up. She was telling me how she is a little bit obsessed with them and how she would like to make more of them. Well I said cool lets have a biscuit making day and we will experiment with all kinds of biscuits. Well that hasn't happened yet ( but it will and you all will get the full report when it does) but I found this recipe online while researching something random and decided last night for dinner to just try them out. Well let me tell you, they were so easy and stupid good, no I mean stupid good. So I can't take credit for them, but here is the well known recipe for 7up Biscuits. You can find them all over the internet but I thought I'd just write out the recipe for you. Enjoy Ya'll!!

7up Biscuits


3 cups Bisquick
1/2 cup sour cream
1/2 cup 7-up
1/4 cup melted butter

Preheat oven to 450.
Cut sour cream into biscuit mix, add 7-Up. Makes a very soft wet dough.( I had to flour the board and add more mix to the top to smooth out)
Sprinkle additional biscuit mix on board or table and pat dough out. Melt 1/4 cup butter in a 9 inch square pan.  Place cut biscuits in pan and bake for 12-15 minutes or until golden brown.


Wednesday, September 5, 2012

New American Cooking,Tortilla Sauce

So this sauce came about because I wanted a white or non red or green sauce for my food and did not want a direct sour cream sauce. I found this reference to a tortilla sauce from Emeril's Website and looked at it and thought, eh what the hay! Give it a try. Well it is amazing, so not what you think. It's kinda like a pureed Tortilla soup and it's really good. I have to credit the Big Guy for this one but of course I put my own touches on it. Give it a try. You'll like it!

Tortilla Sauce

32 Tortilla chips white corn crushed
4 tablespoons butter
1/2 cup finely diced onion
1 can green chili's mild
1/2 cup carrots
1/2 cup celery
4 cups chicken stock
1 Tablespoon finely diced pickled Jalapenos
1 Tablespoon minced garlic
1/2 cup chopped cilantro
2 teaspoons creole seasoning
1/2 teaspoon salt
1/4 teaspoon pepper
1/2 cup heavy cream
1/2 cup grated white jack cheese or white cheddar cheese

Method:

Place butter in a hot skillet and melt
Cook onion,celery,and carrots till soft add garlic and cilantro and peppers and chili's
Add salt and pepper and seasoning
Pour in the chicken broth and let simmer over medium heat for 20 mins.
Add the crushed corn chips reduce heat and add the cream
Stir in the cheese and combine
Place sauce into a blender and blend till smooth
Hold warm or you can refrigerate for later use. Warm over low heat.

Enjoy!


New American Cooking: Mexican Gravy or Red Chili Sauce so Easy and so Good!

OK here is one of the sauces for the Enchiladas in the previous post, but it is such an awesome sauce it could just be my new favorite thing. I mean it is so tasty and so versatile that you could find a lot of uses for it. I think it's so good I should bottle it!

Anyway lets get down to the story. So Mexican Gravy, what is that? Well I did some research and found that this sauce is basically the basis for all foods Tex Mex. It's kinda like the Mexican or Tex Mex version of an Italian Sunday sauce or Sunday Gravy. It's red sauce with a whole lot of chili's in it. It's actually very simple. Chili, stock, flour, fat, some tomato sauce (though not a requirement), and spices. That's it. But it's how you put it together I think that matters. For me I decided not to roast the peppers boil them puree them and use them in the sauce. Although that might have been fun to do it seemed like a lot of work. So I found home recipes and they all seemed to use chili powder and basically one form or another of the elements described above. I found one that also added some Cacao.  It seemed like a good idea. So I threw that idea in there too. I also saw vast discrepancies between how much chili powder to use. I went wit the more is more camp on that one. So I am telling you this so easy it's crazy but if you make it you will never go back to bottled sauce again. So enjoy Ya'll!

Forrest's Mexican Red Chili Gravy

1/4 cup butter
1/4 cup flour
3 Tablespoons Garlic powder
2 Tablespoons Ground Cumin
2 Tablespoons Dried Oregano
1 Tablespoon Kosher Salt
1/2 Cup Red Chili Powder ( I used a mix of regular Store Brand Chili powder and ground Guajillo Pepper powder 30/70 blend ( but you can try other peppers like Ancho)
3 1/2 cups beef broth
1 15oz can of Store Brand tomato sauce ( no High Fructose Corn Syrup)
2 Tablespoons of hot Coco Mix with sugar added.

Method:

Melt butter and stir in the flour
Let cook for a few moments then pour in the other dry ingredients
Cook till starts to smoke stirring constantly
Then add the beef broth slowly combining the mix
When combine let it come to a bubble and boil
Then add the tomato sauce
Cook for 5 mins stirring often
At this point you are done but to get more combined complex flavor to can
reduce heat to low and simmer for 20 to 30 mins
If it gets too thick add more broth or just water
It should be thick and delicious
Add salt to taste if you like it more salty add it
Done. Done Done!

Enjoy on Enchiladas, as a flavor base for Taco meat ( good by little envelopes of salty seasoning), or on steak or braised beef or chicken. You could even use it as a sauce base for shrimp.
 Ya'll Enjoy this!


New American Cooking: Gourmet Enchiladas with Two Sauces, Tortilla Sauce and Chili Sauce

I absolutely adore Mexican Cuisine. It's one of the easiest, most accessible and tastiest cuisines by far. And one of my favorite dinners growing up was always Taco night or Enchilada night at home.

Being a navy family had some upsides and some downsides. My family lived in military housing when I was little and when we were stationed in Hawaii. Life on the base was pretty livable. There were playgrounds and ballfields, pool halls and bowling alleys, and clubs for both the enlisted and the officers. One of the downsides was facilities were not always near where you lived.  For example we would go shopping at the Military Commissary (Grocery) on the main base. It became a tradition that on shopping night we would have either "Taco night" or "Kielbasa, potatoes and kraut night "for dinner. It was a monthly tradition as my Mother and Grandmother would go shopping normally once a month for a"big shop"! I mean they would take a list of all the food needed to cook all the meals we would have for the month. It would end up being three grocery carts full of food. My brother and I would sometimes help but mostly just got dropped off to play or hang with my Dad. It sounds funny but everyone did that back then. Everyone was on a budget and a lot of people did not have the time or the transportation to go to the store regularly.

It is kind of interesting that we used to live like that. I mean in our world today, especially Mine in NYC. , where one can get anything by walking two blocks one would ever need, that we had to shop once a month for both convenience and budgetary issues. I mean it was a trek to the base where the store was and then there was all the planning that went into it. I mean those ladies in my family did a great job of keeping us happy and well taken care of. And it was a lot of hard work. We are so lucky today to live in a world where food is so easy to get. And most people don't even cook as much anymore, with the advent of "eating out" as the norm.  Thank goodness more are starting and many for the same reason's my Mom and Grandmother cooked, Money!

But back to Mexican food. My love of tacos and enchiladas began in the grocery isle with the advent of "Old El Paso" Mexican food products. They became widely available when I was little and our home kitchen jumped right onto that taco wagon. Refried Beans right out of the can mixed with spices and sour cream, red rice, taco shells, a packet of seasonings and ground beef filling was enough to turn our dinner table into a fiesta!  I still love a good taco night to this day as it's still a fun dinner. However, my vision of Mexican food, like the rest of the US, has grown up since then.

In the last 10 years chefs have been creating delicious and gourmet versions of the simple peasant foods of Mexico and South America. And Tex Mex which is different from other types of Mexican foods has taken a direction all it's own. Mexican cooking especially Tex Mex is real American Cooking. It is original and indigenous and takes from the cooking and food traditions of the peoples who came before us and whose traditions were older than the trees. Chef's like Rick Bayless show us the purity and simplicity of the mexican kitchen as well as the deep flavors and different authentic ingredients that make that cuisine soar.

So as I approach Mexican food these days I too find appeal in finding new ways to present "the same old things". I mean an Enchilada is an Enchilada. But I think we all know not all enchiladas are created equally! So as I was thinking about making an enchilada that would be unique I stumbled upon the concept of the Enchilada Banderas. Basically the idea behind this style of Enchilada plate is that it combines different colored sauces and fillings in a trio. The sauces were a red sauce (chili), a green sauce (verde), and a white sauce ( Suiza). All put together on one plate they represent the colors of the Mexican flag. It's a fun a tasty combo.

Well not wanting to make three different kinds of Enchiladas I settled on the idea that I would make two different sauces for one stella Enchilada. I also got the idea that the two sauces should be somewhat contrasting. Namely one creamy and one Spicy. I had recently read about so called Mexican Gravy or the red chili sauce that serves as the basis for all good Tex Mex. And wanting a different "creamy sauce" I stumbled upon and Emeril Lagasse recipe for a Tortilla sauce. So I thought lets combine the two and come up with a filling for the enchilada which is very tasty and different. Potato was a Rick Bayless idea and spinach or cooked Kale also sounded interesting.

So I worked on it and It really came together nicely. I added butternut squash and potatoes with sauteed greens, some white cheddar cheese and some salty crumbly Mexican cheese in a simple sauce of green chili's and  a little sour cream. Just enough to bind things together in the corn tortilla. Made the two sauces which were each a singular sensation and work of labor and love. But put together on the plate, amazing. So this recipe takes some time and effort. You could short cut an use a canned sauce for the red and figure out how to make the white sauce but the effort is worth it. Believe me it's good. So next time you want to kick your Mexican meal up a notch, try this Enjoy Ya'll!

Forrest's New American Enchiladas ( Potato, Butternut Squash, Greens, Green Chili and Cheese) with Tortilla Sauce and Mexican Red Chili Gravy


New American Enchiladas with duo of sauces

Ingredients:
Serves 6

6 large 8 inch Corn Tortillas
1 small onion chopped
1 large Potato cubed and cooked ( in Microwave)
1 cup cubed butternut squash cooked ( in Microwave)
2 cups chopped greens kale or swiss chard sauteed
1/4 cup chopped fresh cilantro
1 can green chili's (mild)
1/2 cup sour cream
2 T milk
1 tsp cumin
1 tsp garlic powder
2 tsp oil plus 1/2 cup oil
2 cups grated sharp white cheddar
1/2 cup Hard White Queso Fresca crumbled ( or Feta Cheese)

3 cups Tortilla sauce ( recipe to follow on this blog) held very warm on the stove top
2 cups Mexican Red Chili Gravy ( recipe to follow on this blog) held very warm on the stove top

Method:

Place onion in a large skillet with oil and over medium heat soften
Add potatoes and squash and spices and salt and pepper to taste
Cook till spices bloom but don't over stir and break up the potatoes
Add the green chili's and sour cream and milk and make sauce
Hold warm. You may have a little extra more than you need for 6 servings.

To make the Enchiladas:

Heat 1/4 cup of oil till hot and fry the tortillas till soft and not yet crispy.
Pull off and place 2 spoonfuls of the filling inside add some of the greens and then some of both cheeses and roll ( make sure you don't overstuff ) then place seam side down on a baking sheet. Repeat till all the Enchiladas are done. Hold in warm oven.

To Serve:

Place a enchilada with spatula into a flat bottomed serving bowl or pasta bowl.
Cover with both sauces first with the tortilla sauce on one end and the gravy on the other end.
sprinkle with remaining cheddar cheese. and garnish with a parsley sprig or cilantro leaf. Enjoy Ya'll!


Monday, September 3, 2012

Trofie Wife! Trofie Pasta with Fresh Basil Cream and Green Beans

One of my favorite flavors is basil pesto on a noodle. It is so overbearingly delicious. I mean pesto dominates everything it touches but also leaves room from shouts of flavor from beneath it's green delicious blanket. My friend Todd once made a homemade pesto that was to die for. But being from Wisconsin he also added some cream to the sauce which I took as brilliant.

I recently returned from a trip to the Midwest for a wedding and I was reminded once again of the Midwest's love for cheese. Wisconsin, especially, is a place where they take dairy to the extreme. They basically add dairy to everything except Sushi. Although, it has been done before, believe me. Wisconsin broadly described is a cheese and dairy lovers paradise. I mean even the burgers there are called "butter burgers" for heaven's sake! While I was working in Wisconsin at the Fireside Theatre in Fort Atikison, Wisconsin, I had the pleasure of seeing a lot of dishes during our potluck sundays which involved the locals bringing in the dairy goodness. My post about my White Enchiladas comes from that time. http://www.cookforrestcook.blogspot.com/2011/12/winter.html and if those aren't cheesy goodness i don't know what is!

So I thought about making a pasta dish that would be a little more sophisticated than just pesto and cream. I thought about a basil infused cream and I thought about my love of monochromatic dishes. So to stay along the green lines and stay with summer's bounty I thought why not add some fresh green beans to the dish and to add more flavor some smoked cheese as an accent. I suppose in the fall and winter you could add asparagus tips instead of the beans, but summer seemed a good time for the grean beans. Also I have learned that cooking fresh basil can be tricky. You have to get the green to set up in hot water by blanching it quickly and if you over cook it it will turn brown. The same principle applies if you saute it, so I knew I would have to work on keeping it green.

This recipe is so simple yet comes out so elegantly. If you want to impress people, even Italians, with your pasta proneness, this is a good recipe to start with. I also love the the fresh green color and the vibrant monochromatic simplicity of the dish. So try it and keep a little of summer's green with you into the fall. Enjoy ya'll.

Trofie Pasta with Basil Cream and Green Beans
makes 4 to 6 portions

Ingredients:

1 pound dried trofie pasta
1 cup heavy cream
3/4 pounds of fresh skinny green beans
1 1/2 cups packed basil leaves
3 tablespoons butter
1/4 cup grated smoked Mozzarella cheese
1/2 teaspoon salt and some white pepper to taste

Method:

Bring a large pot of water to a boil. reduce to simmer and add green beans. Let cook till al dente about 7 mins.
Remove from the hot water and plunge into ice cold water to stop the cooking
When cool cut the beans into thirds.
Bring water back to a boil add pasta and cook for 7 to 9 mins or till pasta is done.
Meanwhile saute 1 cup of the basil till soft in the butter ( about 2 mins.) add the cream and the remaining basil and cook two more mins. Transfer mixture to a blender and puree till smooth.Add salt if desired.
Place the sauce in a large bowl
Add the beans and the hot pasta and toss till coated.
Add the cheese and toss serve it with chives and parsley leaves.


Saturday, August 25, 2012

Toasted Sesame Garlic Dressing Recipe Homage to the Lobster Pot, Green Salad with Green Beans and Walnuts

Provincetown Mass. is probably one of the most beautiful places on the planet and definitely one of my favorites. It is a magical place full of the promise of freedom and Summer openness in a way that few places can mirror. It's setting on the hills above a blue bay curving around in on itself and capped with a light house that beckons as well as warns. Beckons "come and partake" but warns to ""leave all your judgements and prejudice" at the harbor's mouth. The houses rise in clusters and rows winding up the narrow streets that branch off from the water's edge. Gardens and flowers are everywhere, testimonial to the season and the Summer's rebellion against the harsh Winter that is bound to follow as if it were yet declaring,"I am here and blossom in my season regardless of what fierce cold and blustery winds you will bring in your time, this is mine and i am Alive"!

The town bustles with Families and groups of friends and strangers engaged in the business of summer fun. And that of course involves dining and eating. And that means Seafood and one of the landmark establishments that celebrates seafood is of course The Lobster Pot. www.ptownlobsterpot.com/ 

SO as you can tell I must be a fan! Well I am mostly in the sense that my friends and I who go every Summer have a tradition of going for dinner once during our time there. And we always have a great meal and a lot of drinks! 

One of the highlights which might seem silly it the salad that accompanies the dinners. It is nothing more than a big bowl of various lettuces and a tray of 4 dressings. Blue Cheese, Toasted Sesame, Creamy Garlic, and Italian. You can pick whatever dressings you want. Well somewhere along the way someone discovered that if you mix the Toasted Sesame Dressing with the Creamy Garlic you get a taste sensation! I mean this stuff is Yummy Good! So of course we always end up asking for more lettuce and eat a very healthy portion of salad with our meals. 

Well I came back from Ptown aka Provincetown, and decided why not just make a dressing that was a combo of the two. Well it worked and I created a dressing that was garlicky and thick and herbal with that toasted sesame undertone. With this dressing I decided on the fly to put together a salad for my dinner party that night. So I shredded up 1 head of romaine and some basil leaves and chopped up about 4 oz of french green beans. I also crushed up some fresh walnuts and thought that would add some more texture and make a nice topping. Also I added a touch of grated parmesan cheese but you could leave that out. I just love cheese. I cut some tomatoes into wedges and lined the out side of the plate. Piling the dressed salad in a mound in the middle and then garnishing with the crushed walnuts. I added in some chopped scallions ( the white parts ) and viola! I had a great salad! 

Creamy Toasted Sesame Garlic Dressing

3/4 cup Mayo
1/4 cup red wine vinegar
2 tablespoons Toasted Sesame Oil 
2 tablespoon garlic oil ( if you don't have garlic oil add another teaspoon of garlic powder
1 teaspoon soy sauce
1 teaspoon Worchestershire
1 teaspoon salt 
1 teaspoon pepper
1 tablespoon Italian Dried Herbs
2 teaspoons Dried Basil
1 teaspoons garlic powder
1 tablespoon grated romano cheese
1 teaspoon white vinegar

Put into a dressing bottle and shake everything together till creamy, add more sesame oil if you want it more pronounced.
Enjoy Ya'll

Wednesday, August 22, 2012

Steak salad...well a Salad that can stand up to steak

There are salads and there are salads. There was an amazing post on 101 cookbooks the blog, the other day about a yellow bean salad with a coconut dressing. Sounded delish and it inspired me to look at beans again as another source of side dishery for the summer. I make several mean green bean salads. I love them. They are lighter than a starch yet give you that feeling that you are eating something substantial. And salads are a source of summer culinary joy! But I mean there are salads that stand on their own and are an entree unto themselves, and then there are salads that are part of a collection of dishes in the summer that help to make up a feast. This post is about such a salad.

 The other day a friend brought over the most amazing rib-eye steaks ever. Aged for 30 days and so decadent. He wanted to serve it up grilled with some soft blue cheese from france melted on top and a dap of butter. Heart healthy I know! So I was to come up with some sides that would support this very ambitious red meat eating frenzy.

At first I thought I would make a potato salad and a tomato salad. This sounded pretty good. But as the evening approached and I went to the store I decided on a little something more summery. Inspired by the 101 cookbooks post I looked around the store and decided that a green bean and fresh corn salad with a warm bacon dressing and some other tasty tidbits was in the works.

Now before you scoff at this being another one of these "I love bacon things",  let me say that this salad actually came out very light. There was in fact very little dressing on it and because of the crunchy beans, corn,  onions and almonds it was hefty but not heavy. The dressing was really little more than the left over bacon drippings some red wine vinegar, some danish dill sweet mustard ( I had in the pantry) and a dash of olive oil. Believe me when I say lightly dressed yet delicious. The mustard and the dill helped a lot.

But the real tribute to this salad was that it really stood up flavor wise to the steak. And that's what's great about it. So the next time you are going to try and use some green beans, give this a try.

Haricot Vert and Fresh Corn Salad with a Warm Bacon Dressing.
make 4 to 6 servings depending on other sides

8 ounces Haricot Vert ( I used one package from the Trader Joe's Veggie Aisle)
2 ears of corn yellow sweet
2 stalks of celery finely diced
1/3 of a red onion finely diced
1/3 cup sliced almonds
3 oz slab bacon cut into lardons
1/3 cup french fried onions ( I use the fancy french ones you could use French's)
1 teaspoon pink peppercorns ( optional for garnish)

Cook beans in the microwave for 1 1/2 minutes on high remove and cool
Cut beans into three segments
Cut corn off the cob
Cook the bacon slowly to release the fat. Remove leave drippings in the pan
Put all remaining ingredients into a bowl along with the beans, corn and bacon.
Toss in the dressing taste and season with S&P to taste and let stand at room temp for about an hour, or serve immediately if you want.

Dressing:

Warm the bacon drippings in the pan ( about 2 tablespoons)
Add 3 tablespoons red wine vinegar
3 tablespoon Dill mustard ( Or mix dijon with some dill and sugar)
4 tablespoons olive oil
1 tablespoon water
S&P taste
Stir together over low heat till warm and mixed through, dress salad while warm.


Friday, August 3, 2012

Fresh Corn and Shrimp Salad

Every now and then I try to use the fresh ingredients that are totally seasonal and in the rawest form. This is especially true in the summertime when we have access to things being sold in their real growing season. I also have been trying to eat more fresh foods ( aka salads) in the heat wave we are having because grilling is hot!

Now being from coastal South Carolina. I have over time and upon reflection recognized that people down there are slightly Shrimp obsessed. I mean it's clear why. Shrimp are fresh and local and Shrimp are good eats. In any form fried, boiled, poached, bbq'ed, roasted, hot or cold Shrimp are good! They are also a great summer warm weather protein. Light and fresh they go well with the "it's too hot out to eat a big meal" mentality. I mean your could consume a pound of peel and eat shrimp and still have room for that burger right...but I digress.

So this summer for some reason I have also returned to my memory of eating fresh corn. I mean it's a memory because I only remember it as a small boy in the summer at my Big Mama's house. Corn right  out of the garden and right off the cob, blanched for a hot second and served up at the table with lots of butter and salt and pepper. Yum! It was amazing. So this summer I thought why not return to that goodness. And so I have, serving up a corn salad which I wanted to pair up with a seafood as an entree salad for a rooftop meal. I choose shrimp because they are so easy breezy cover girl to throw into anything right out of the freezer bag. Just thaw, de-tail and go! But I suppose you could use just about any seafood/shellfish.

The point is the corn salad is nice and crunchy and fresh. I mean it's not even cooked!
The seafood you could leave out and no one would miss it. In fact I made this again the other day and left out the tomatoes and the seafood and it was amazingly good! So eat a little corn Ya'll it's good!

Fresh Corn Salad with Herbs ( Shrimp and tomatoes optional)

Feeds 4 to 5 as a side dish

6 large ears of freshest corn cut right off the cob
1/2 small red onion finely diced
5 scallions chopped including whites
12 basil leaves chiffonade
1/4 cup of fresh chopped parsley

Dressing:

1/2 cup sour cream
1/4 cup mayo
4 tablespoons tarragon vinegar ( use cider if you don't have )
1 bunch of chives
1/2 cup parsley
4 tablespoons milk plus more added only if too thick in the blender
1/2 teaspoon garlic powder
salt and pepper to taste

Place everything in a blender and puree till smooth.

Mix dressing with the corn and other ingredients till lightly dressed and serve right away. Or chill in the fridge for a couple of hours or overnight for a more marinated flavor.

Additions:

Add chopped multi-colored cherry tomatoes and some heart of palm sliced also some peel and eat shrimp for an entree salad.

Shrimp and Fresh Corn and Herbs Salad

Thursday, August 2, 2012

Forrest's Famous Burgers, If you have had them, you know!

OK, it's summer and it's time for grilling and the roof here in NYC. I have a great roof deck. And I love to entertain. So that being said, work has slowed down in the catering business, the grill is on and the weather is hot, so it's up to the roof for some hanging out time.

Now one of the staples of the American Grill Experience has got to be the Burger. Oh and by Burger I mean Cheeseburger, cause what else is there really! When I was a kid we lived in very tropical and sub tropical climes. My Dad and Mom both were big fans of the grill, and as a little boy especially when we were stationed in Hawaii ( yes navy brat here ) we spent plenty of nights cooking out. Now my Dad did a lot of the cooking and he would whip up some tasty things. Especially loved the steaks, done Hawaiian style, which was popular at the moment. And I loved his burgers.

Now that being said I am not sure to this day who came up with the seasoning that went into the Hedden Family burger mix. It could have been my Dad or my Mom, but it could also have been my Grandmother Irene, my mom's mom, who lived with us from the time I was in 2nd grade on. She and my Mom split duty in the kitchen and so you never were sure where and who invented some of the wonderful recipes I remember eating growing up. So it is with the burger spice mix. but I will get to that. First let's just talk about burgers.

OK, now today we have an explosion of Burger technical knowledge going on. The Food Network has stars like Bobby Flayhttp://www.bobbyflay.com/recipe.php?id=200&v=2 and Tyler Florence http://www.tylerflorence.com/?p=877 providing no end of burger expertise and advice. The science of making the best burger is really amazing and people are invested fully in it. Chefs everywhere seek out the right custom meat blends and place emphasis on the most organic and obscure ingredients to differ their burger from the next. I mean short rib mixed with sirloin, mixed with pork shoulder. I mean come on, pork shoulder in a burger??? But nonetheless these guys are serious about what they are doing and take things to extremes of taste and texture never before seen. And we haven't ever started to discuss the bun or the cheese or the condiments! Wow, too much work Maria!

Well back in the late seventies we didn't have such luxuries, and even if they had existed, we were a poor military family living on foods from the commissary! No such meat blends there. No so as I approach making burgers I do it like my Dad did, use what you got! And that meant ground Chuck. Yes, the ole staple of the supermarket bargain brand. Now mind you they did try for the lower fat content, but ground Chuck is ground Chuck. And fat equals flavor, so they were onto something even with such a pedestrian meat choice!

The other element of the burger was the spices they put in them. Now I know what some of you are thinking! Sacrilege!! Spices in the meat. Well, yes that was the way it was done. I mean who wants just beef flavor? Well, believe me I know how good that can be and i know meat should speak for itself, but indulge me. I getting at a flavor profile here that is a little different. So, back to the spices. I am to this day not completely sure of the spice blend and have since made it my own but i can tell you the basic elements are the following, Worchestershire sauce, onion powder, garlic powder, salt, black pepper. That's it. Very basic but the quantities are important. Basically lots of the sauce, onion and garlic. A little salt and a good dose of pepper. Sometimes there would be chopped onions in it, sometimes not. I like the not, but sometimes there were. This when placed in the meat creates amazing beefy flavor. People love it. I have now been making these burgers for at least 10 years in NYC and I can say without exception people always want the recipe. I tell them what I will tell you, it's all in the feel, just add in what you want and how much you want. These are the ingredients, make it your own!

OK, now we get to the other elements of what makes my burger, my burger. I am talking cheese and condiments. So to make a Forrest Burger it's quite simple. But let me explain. When I make a burger I make you a burger. This is not Burger King and unless you have an allergy you will eat it MY way! Just kidding, well just a little. Actually when I do burgers I serve them fully dressed and skewered with a long pick to hold it together. So you get the full effect! I mean it's a chefs creation here so just go with it!

Ok Bun, let's talk Bun. I have to say I love a potato roll. Martin's potato rolls are some how amazing! But I would not say no to a really lovely seeded hamburger bun if top quality, nor to a brioche if very fresh and not all dried out. Or you could go old school and use a sesame bun. So those are the choices, mostly using the potato rolls cause I love them and they are very easy to find!

And then the Cheese, well I have to say I like yellow sharp Cheddar slices from the dairy case. Nothing too fancy I am afraid. Melted nicely on the patty and then served onto the bun.

Finally condiments, well  here's the trick. I use the basics and include one thing that's a little different but I find brings it to a home run. So that being said the condiments are mayo on both sides of the bun, on the top bun a little ketchup and mustard ( yellow), then a thin slice of tomato the same size as the bun, and shredded romaine lettuce mixed with a little bit of mayo. Then on the bottom bun a nice smear of hickory flavored BBQ sauce. Yes it must be hickory. Kraft makes a good one.

And that is it. So this is all stacked on top of the beef patty which sits directly on the bottom bun.  Skewered with a long pick and served up either on the plate or on a platter for a buffet. And that if it. Enjoy Ya'll!

Forrest's famous Burger's
Makes 10 burgers

3 pounds of ground meat 80/20 min fat content chuck or mix of sirloin and chuck
3/4 cup Worcestershire Sauce (I use the French's version of the bottled sauce)
2 tablespoons onion powder
2 tablespoons garlic powder
2 teaspoons of black pepper
1 tablespoon oil
salt to taste

The Cheese:
Slices of good quality sharp yellow cheddar cheese

Buns:
Martin's Potato Roll Large dinner rolls or burger buns

Toppings:
2 1/2 cups shredded Romain lettuce
10 center cut tomato slices from beefsteak tomatoes
1 cup chopped white onion
30 slices of dill pickles 3 per burger

Condiments:
Ketchup
Yellow Mustard
Mayo
Hickory flavored BBQ sauce

Method:

Mix meat gently with the spices don't over mix
form into 6 burger patties ( I use a metal burger form)
Before grilling use your thumb and press an indentation in the center of each burger this will keep them from puffing up during cooking.

Over a hot grill, coals or on a griddle cook 3 to 4 mins per side for med rare turning once and don't press the juice out of the burger just let them get a good sear on them. Melt the cheese 1 to 2 mins before you pull them off the grill.

Toast the buns on the heat and spread with a slather of mayo
spread a nice smear of BBQ sauce on the bottom bun and place the dill slices and onions on it
When burgers are done place on the bottom bun
top with lettuce then tomato slice
Place a good smear of ketchup and mustard on the top bun an close
Skewer with a 6 in restaurant wooden pick if you can find them or a skewer of any kind.

Serve up with a loaded baked potato or salads for a summer buffet

Enjoy Ya'll!!!


Wednesday, August 1, 2012

Chips and Dips are for Whimps! Avocado Spread with Rosemary Flavored Foccacia Toasts!


I love avocados in the summertime. I mean what's not to like about them. They are the basis for Guacamole which has got to be one of the best things ever. They are smooth and rich and buttery tasting, and have the most wonder ability to compliment a variety of starchy foods.

In this past month's issue of Food and Wine Magazine, one of the contributors talked about avocado toasts with sea salt and red pepper flakes. He explained that the simplicity of the grilled bread with the rich and picante flavor of the mashed ripe avocado was the highlight of his dinner party. Well he was right on. I tried this delectable recipe and I have to say it was good. However, you know I love to take something and make it my own so I decided to do just that. But lets not get ahead of ourselves here, this desire to do something different with it started with the Toast.

Now toasted bread is perhaps one the greatest things in the world as far as I am concerned! Toasted bread is crispy, crunchy, warm and can be savory or sweet, It can be topped with anything from butter and jam or vegetables to melted cheese. It is in short the most wonderful vehicle for savoring a variety of foods. But all toasts are not created equal. And when I thing of toast I want two things, excellent flavor and exciting mouth feel. I love good old plain bread toast for certain things. But for a toast or bread plate to really be special I think you need to move past the everyday bread into the realm of flavor and texture. And the one bread which I think has both these in spades in the Italian Bread called Foccacia!

So for those of you who do not know what Foccacia is let me explain. It is Italian in origin. It is a yeast bread which is baked into a flat load and is loaded with olive oil goodness. It is soft and sponge like yet firm and chewy. It is excellent plain but I have discovered it is even better toasted. Toasting the Foccacia gives it another layer of texture and brings out it's oily goodness even more.

Well using that as a starting point I thought, why stop at toasting the focaccia? Why not give it a grilled treatment, not unlike what grilled cheese bread goes through. Butter it and grill it crispy, crunchy and salty and serve it warm. Maybe with olives and olive oil. Yum. Well that's where my bread plate idea started. But where is ended was with the avocado toast idea.

So to make the avocado toasts normally you slather it on and serve it up. But I decided to make a play off the chips and dip idea and serve it already prepared like guacamole would be letting people put it on the bread themselves. And then substituting things like the sea salt and pepper flakes, lemon juice and good quality olive oil for the traditional Mexican flavorings Thus giving the spread an richness like green butter. Ah, and it was so good when I served it up!

So next time you are having people over make a little effort and try this instead of the old chips and dip. It will elevate your dinning experience a notch or two and make your guests so happy. So enjoy, Ya'll!

Avocado Spread on Foccacia Toasts
serves 4

4 small to medium ripe but not over ripe avocados
Maldon Sea Salt ( or other course flaky sea salt)
1 to 2  teaspoons red pepper flakes depending on your heat level ( plus more for garnish)
VERY good quality finishing olive oil about 1 1/2 tablespoons

Method:

mash the avocados in a bowl till very creamy add sea salt flakes to taste and red pepper flakes to taste.
Add the olive oil and stir together till creamy and combined
Place in a small dip or serving bowl and garnish with more salt and red pepper flakes, drizzle olive oil over the top till it rests in a small pool in the rim of the dish.
Serve with toasted bread

Forrest's Bread Plate

Foccacia Bread loaf
Good butter at room temp
olive oil
rosemary flavored oil
Maldon Sea Salt

Method:

Cut bread into rectangular pieces which are about 4 inches by 2 inches
Slather one side with butter
Place enough olive oil in a skillet till the bottom is lightly coated
Turn on heat to med high
When very hot place the bread butter side down in the pan and allow to cook till toasted and browned
Turn over and let grill till the other side is toasty
Drizzle the rosemary oil over the bread and sprinkle with the sea salt
Place on a plate and serve immediately or at room temp is fine but warm is better!

Enjoy ya'll